tech-setup
Smart Home Hub and Zigbee Network
Local smart home with a Zigbee coordinator, Home Assistant, and a mix of sensors and switches—no cloud required.
12/12/2024
Mocked test content (AI slop) just to play around with a hypothetical blog like it's 2010. Created using a random combination of Cursor, Claude Code CLI & VS Code Plugin, Antigravity IDE, Gemini CLI, etc. with the latest LLMs, just 'cause.
tech-setup
Local smart home with a Zigbee coordinator, Home Assistant, and a mix of sensors and switches—no cloud required.
12/12/2024
woodworking
Custom closet system with hanging rods, shelves, and drawers—no more wire shelving or wasted vertical space.
11/11/2024

tech-setup
Dual monitor arms, keyboard tray, and a few tweaks so the desk fits your body instead of the other way around.
10/10/2024
woodworking
Adding a 2HP dust collector, PVC ductwork, and blast gates so every major tool ties into one system.
9/9/2024
woodworking
A solid-wood top on a height-adjustable frame for a standing desk that doesn’t wobble and looks like furniture.
8/20/2024
tech-setup
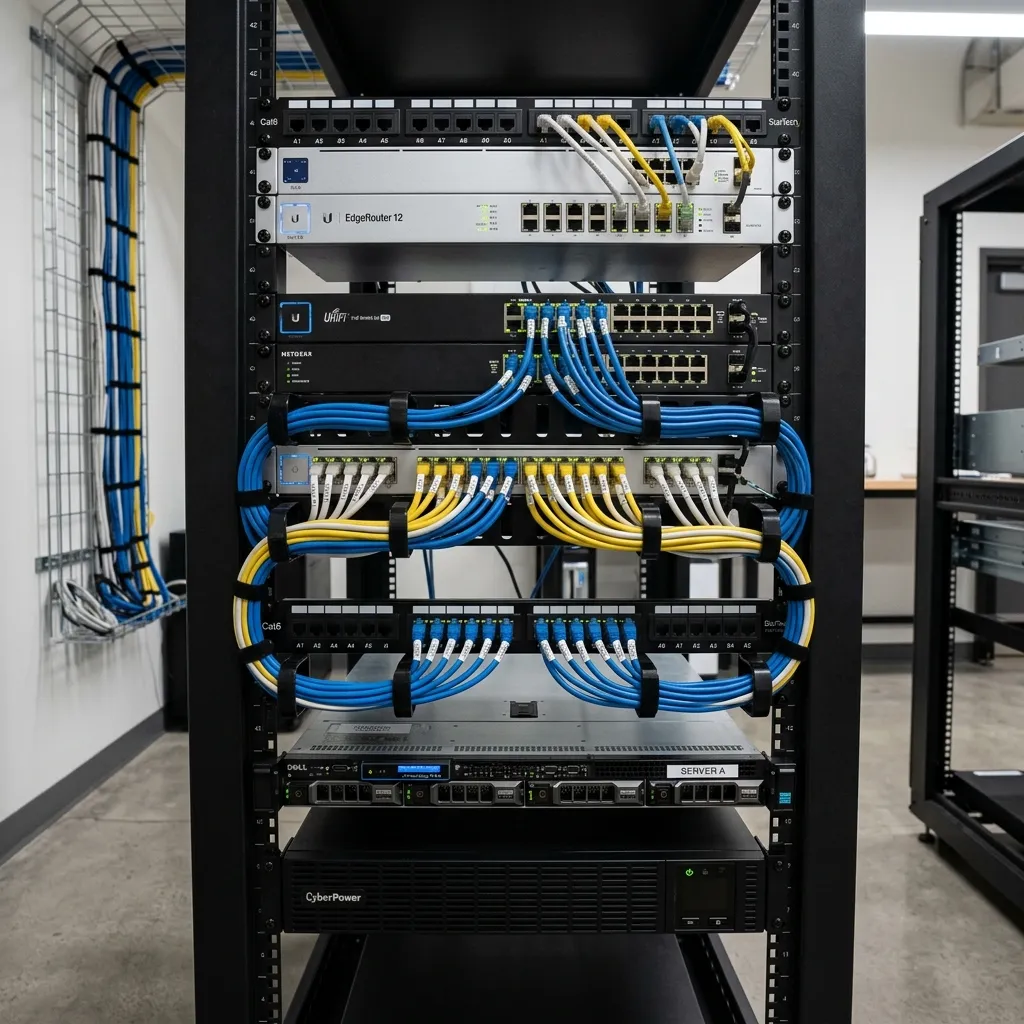
A small wall-mount rack with a patch panel, switch, and cable management so every room has a wired drop.
8/8/2024
tech-setup
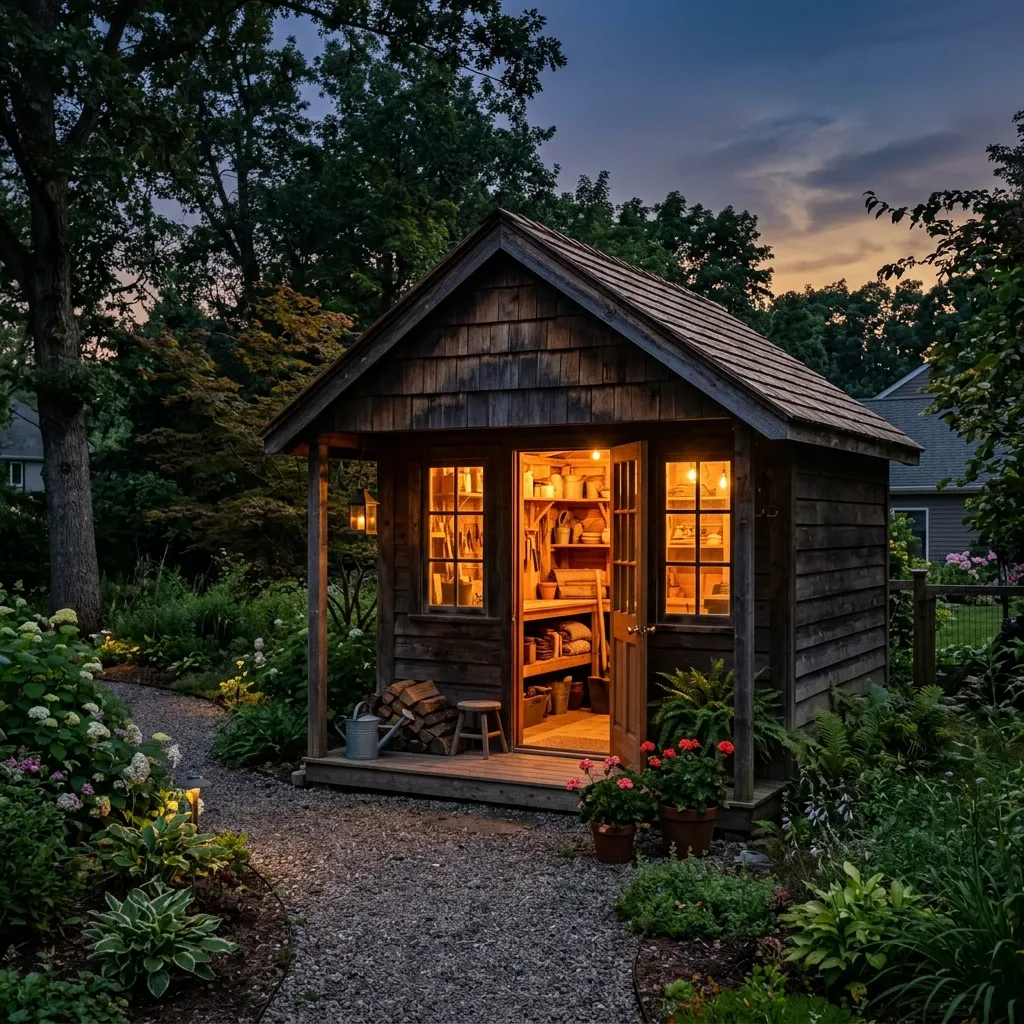
Running a dedicated circuit to the shed for lights and outlets—subpanel, conduit, and GFCI protection.
7/19/2024
renovation
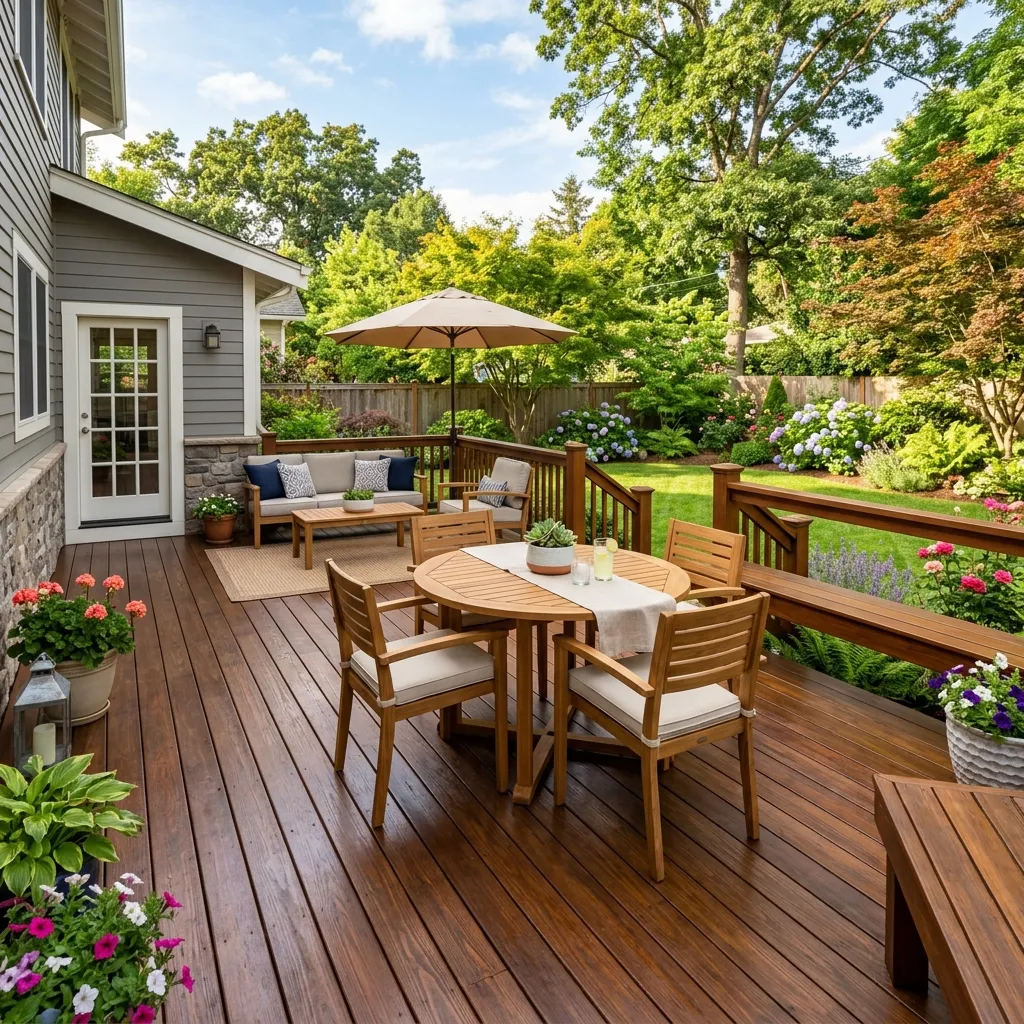
Cleaning, brightening, and two coats of semi-transparent stain to bring the deck back and protect it from sun and rain.
7/7/2024
renovation
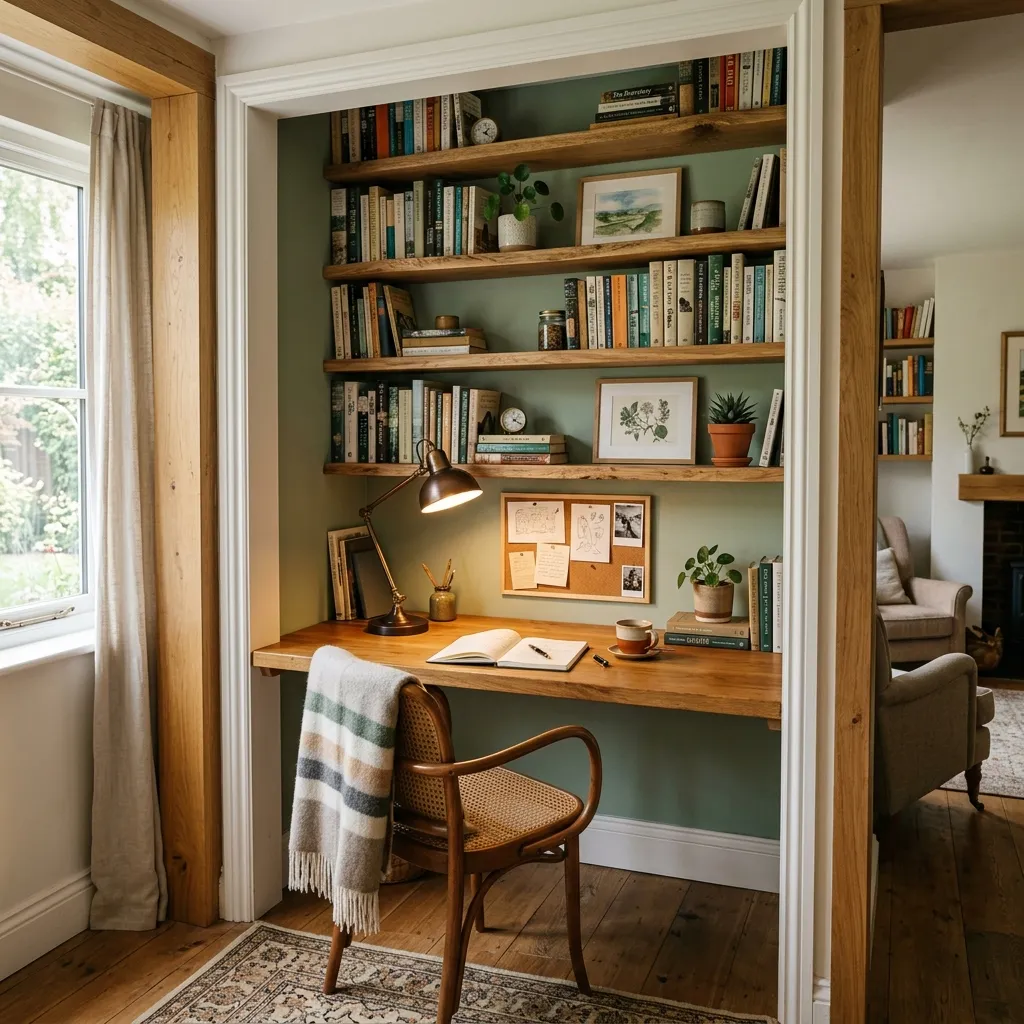
Turning an underused corner into a dedicated study nook with a built-in desk, shelves, and task lighting.
6/18/2024
renovation
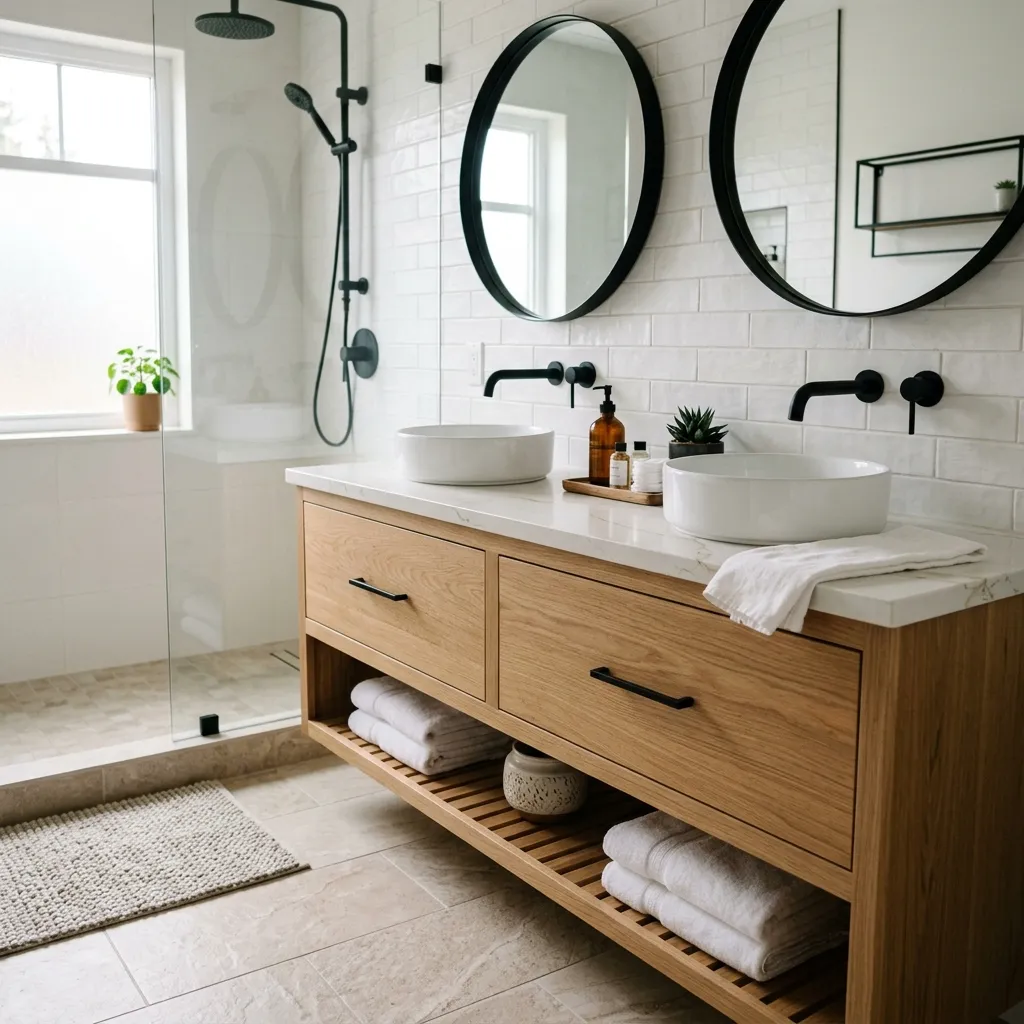
Replacing a builder-grade vanity with a custom cabinet and new countertop—more storage and a single vessel sink.
6/6/2024
woodworking
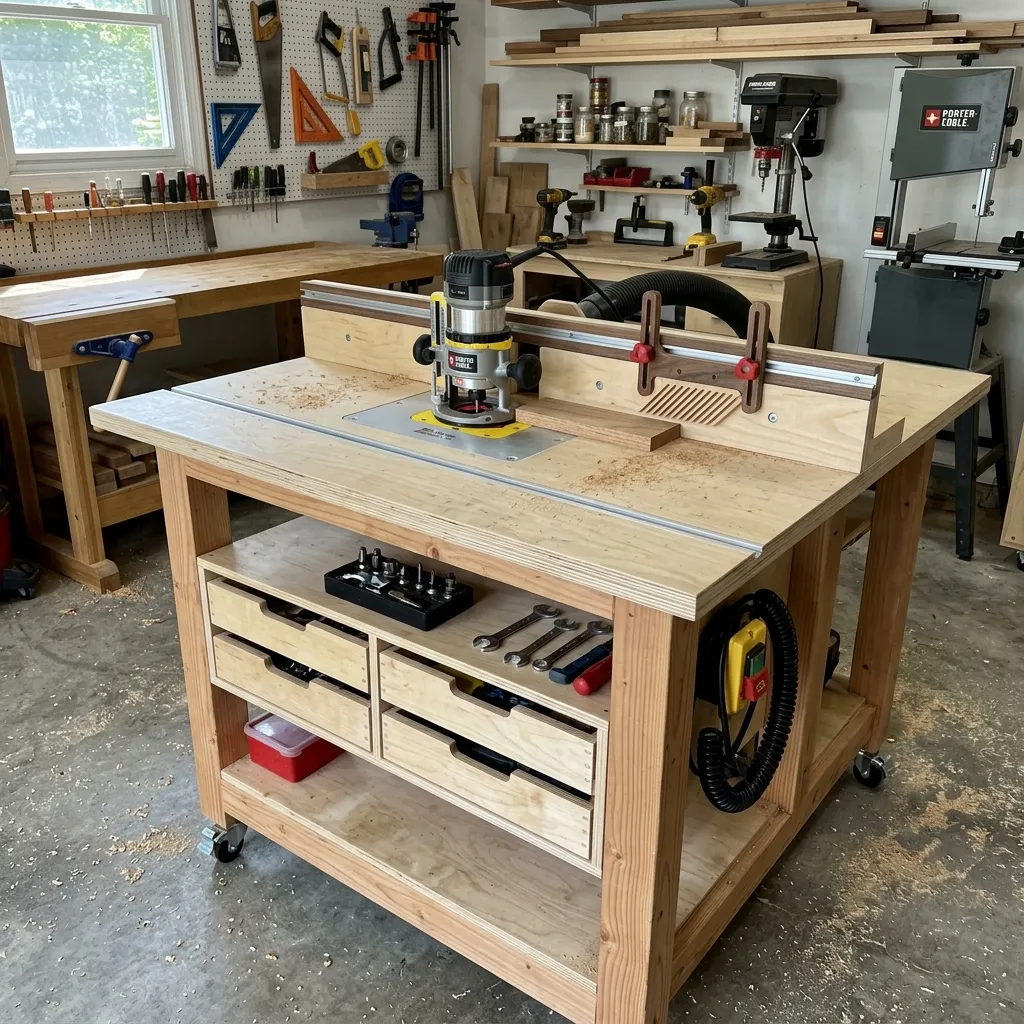
A shop-built router table with a cast-iron top, lift, and fence so joinery and edge profiles are repeatable and safe.
5/17/2024
woodworking
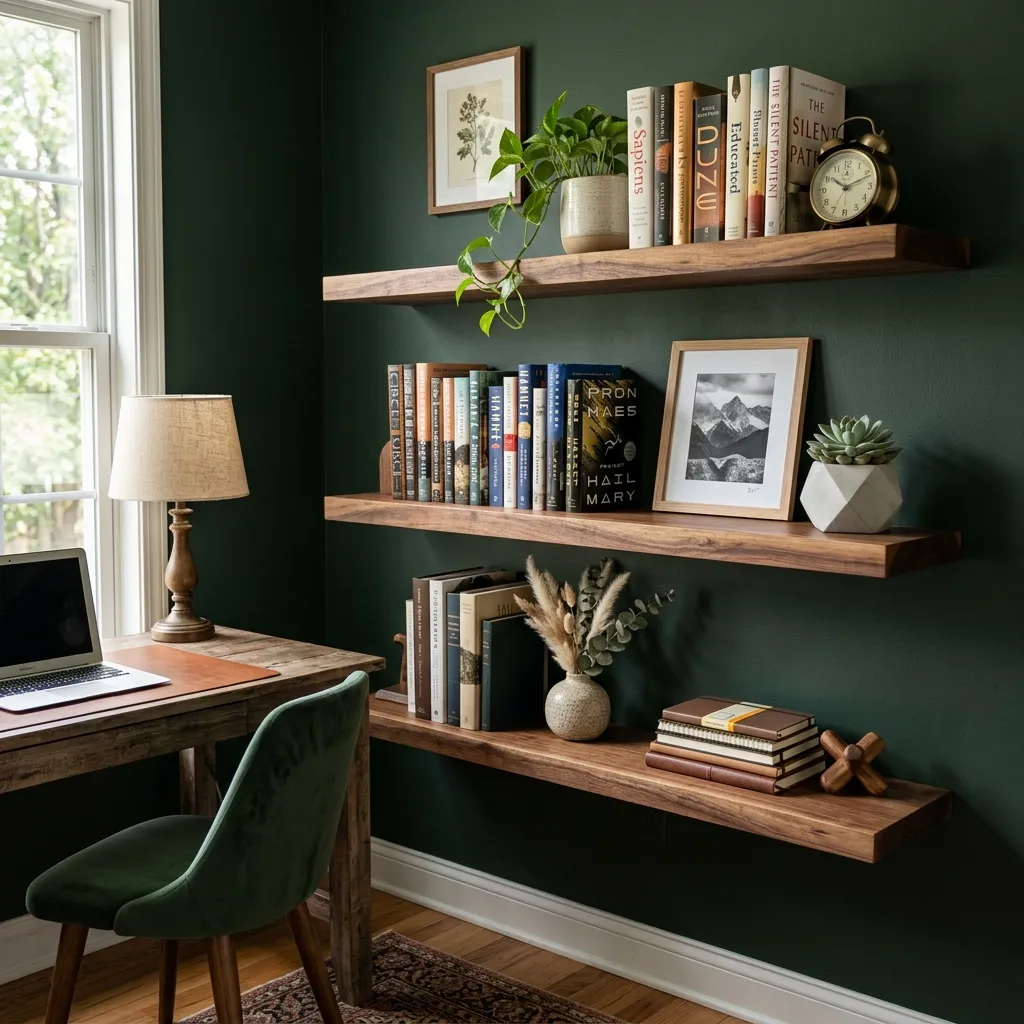
Simple hardwood floating shelves on hidden brackets—enough for books and plants without eating floor space.
5/5/2024
renovation
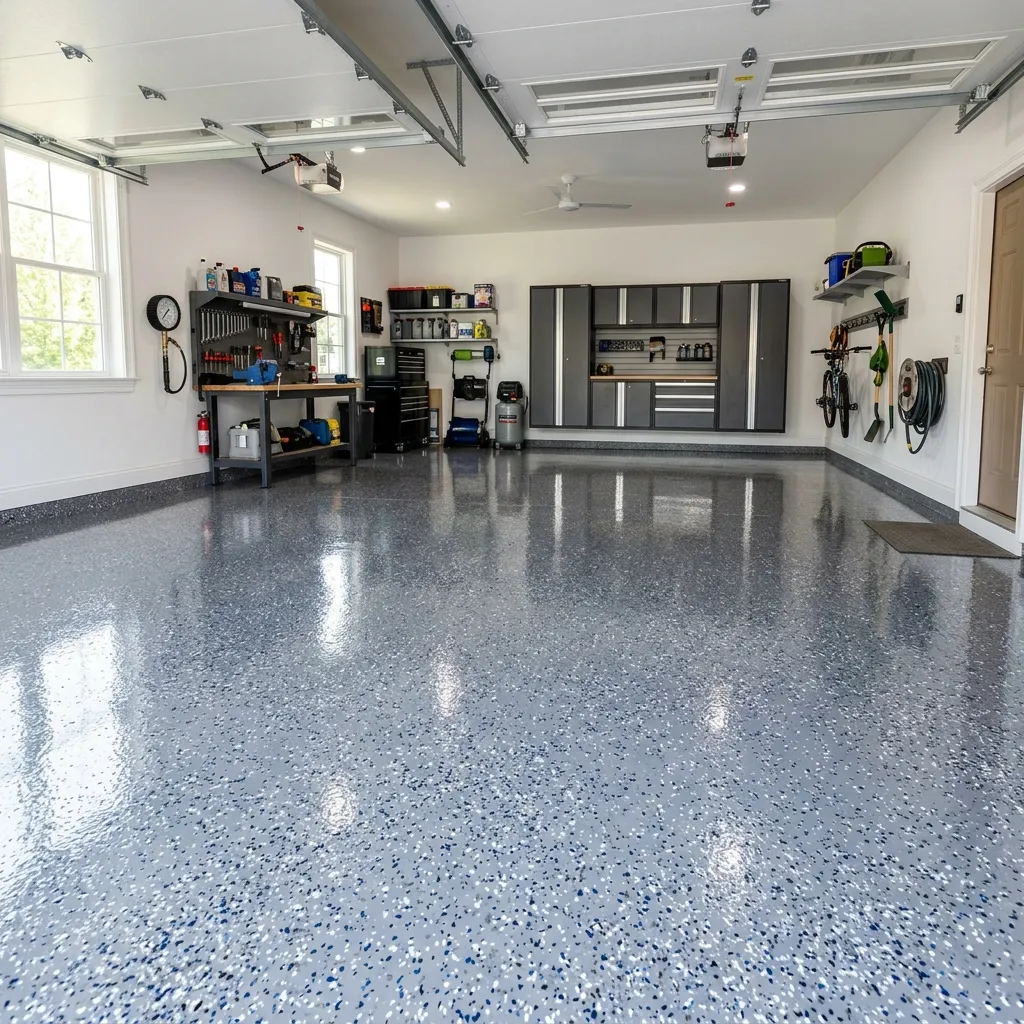
Two-part epoxy coating on the garage slab: prep, primer, flakes, and topcoat for a durable, easy-to-sweep surface.
4/16/2024
tech-setup
Cleaning up under the desk with a simple cable tray, velcro ties, and a powered hub so only one cord hits the outlet.
4/4/2024
woodworking
Floor-to-ceiling built-ins around the fireplace for books, plants, and the TV—no more floating shelves.
3/15/2024
tech-setup
A small homelab for backups, media, and self-hosted apps, built from a used desktop and a few drives.
3/3/2024
woodworking
A built-in bench with cubbies and coat hooks that finally tames bags, shoes, and winter gear.
2/14/2024
renovation
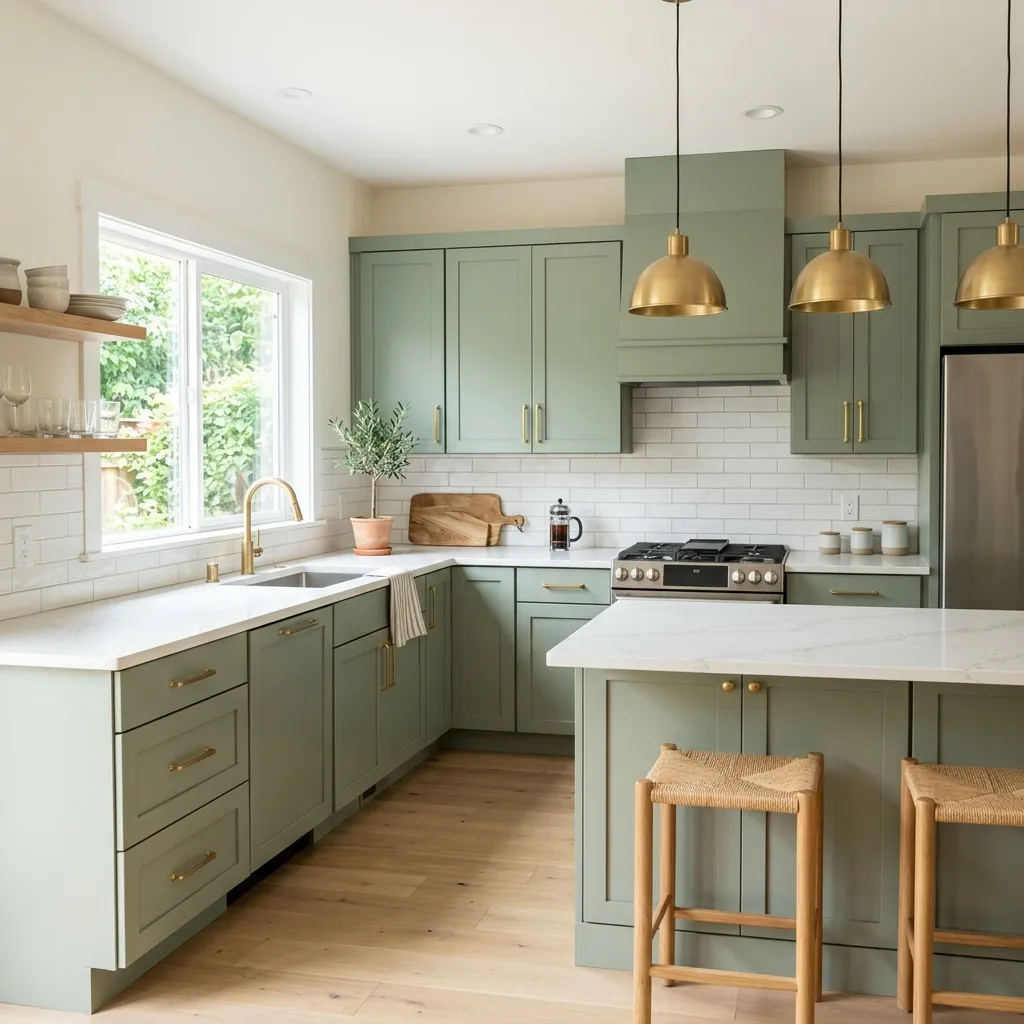
Paint, new hardware, and a weekend of prep turned our dated oak cabinets into a clean, modern kitchen.
2/2/2024
woodworking
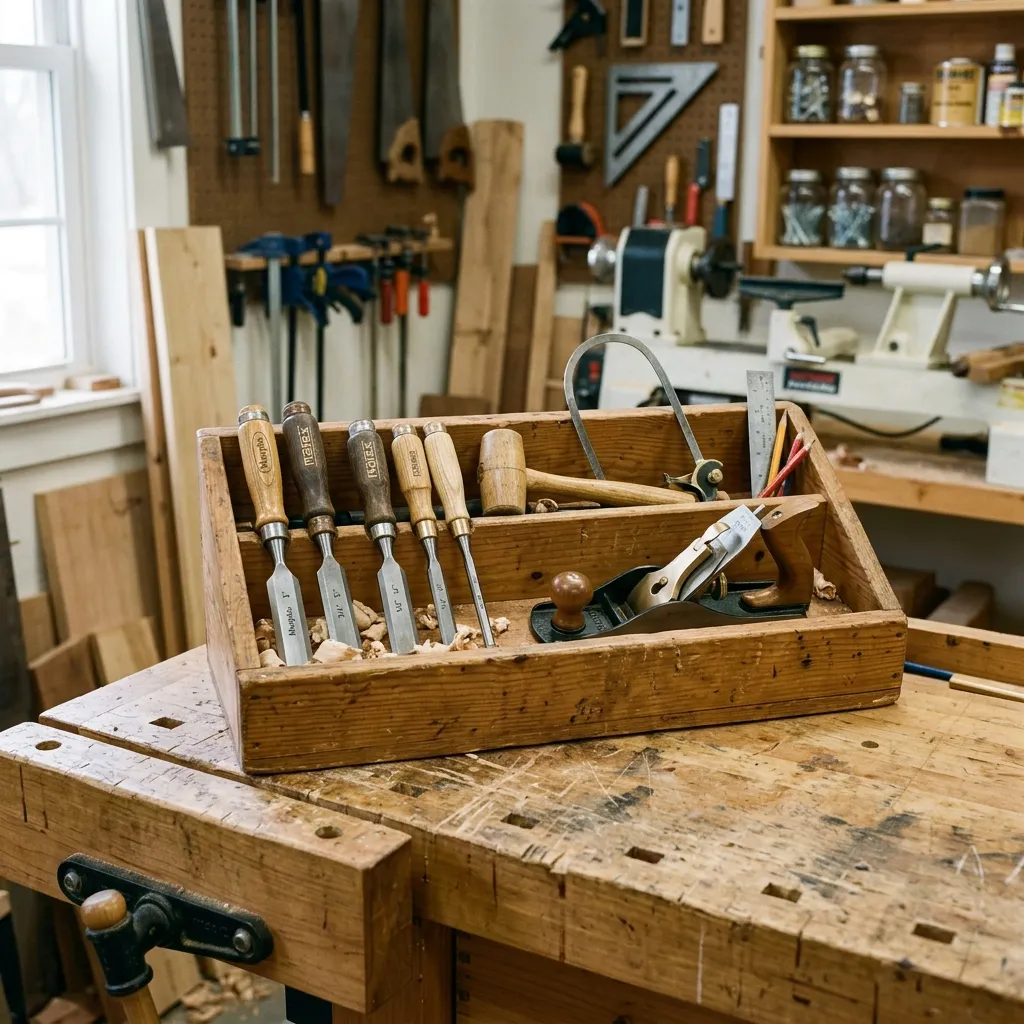
A shallow tray behind the workbench vise for chisels, layout tools, and small parts so they’re in reach but off the top.
1/13/2024
woodworking
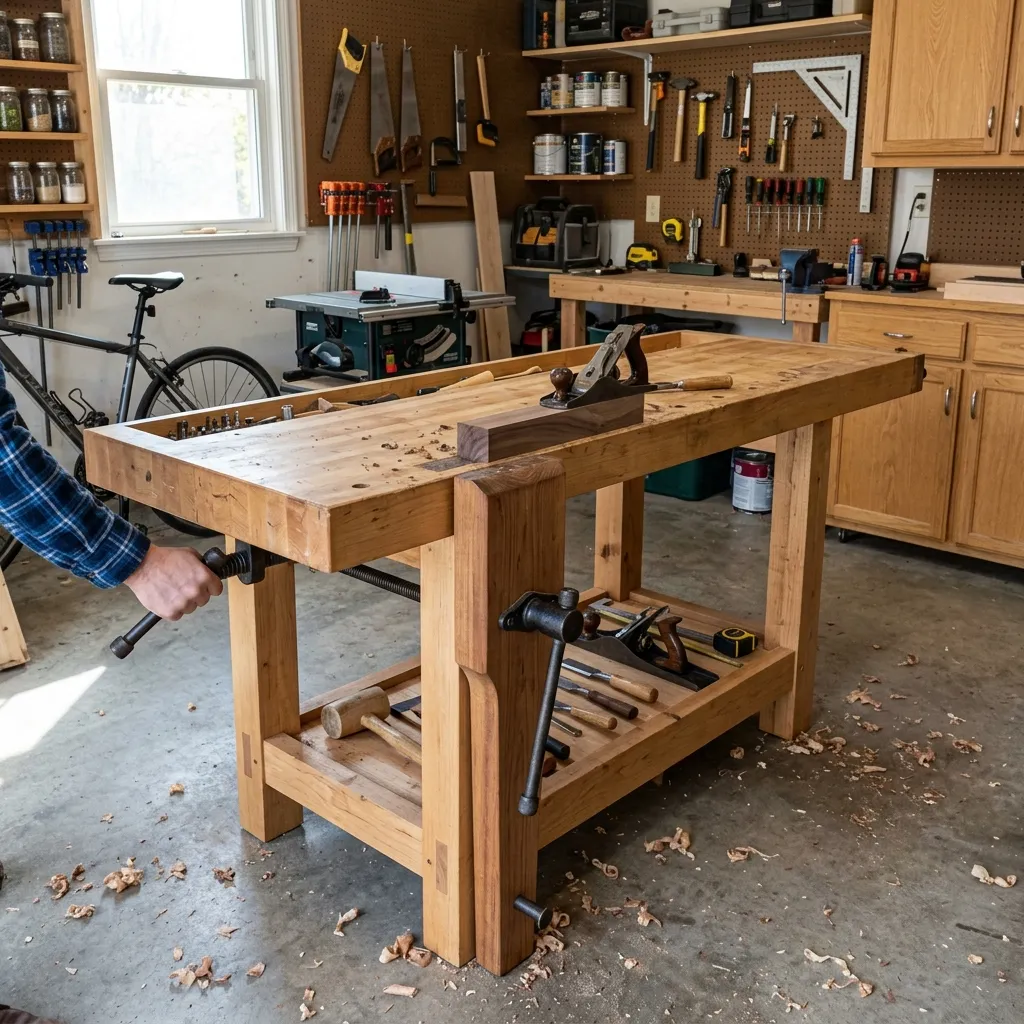
A compact, rock-solid workbench for the home shop, with a laminated top and plenty of vise real estate.
1/1/2024
Fake Blog Entries
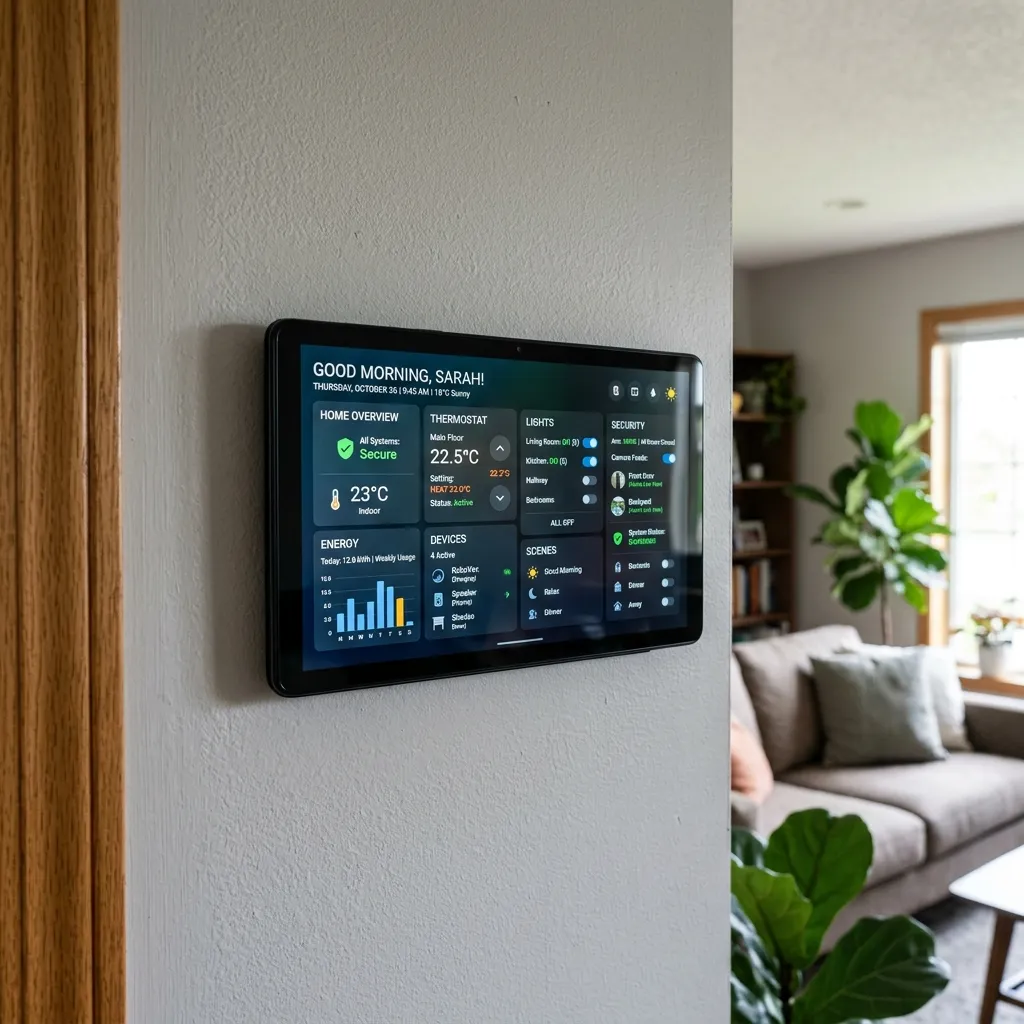
I wanted smart lights and sensors without locking everything into a cloud. So I set up Home Assistant on the home server and added a Zigbee coordinator so we can use generic sensors, switches, and bulbs that all talk locally.
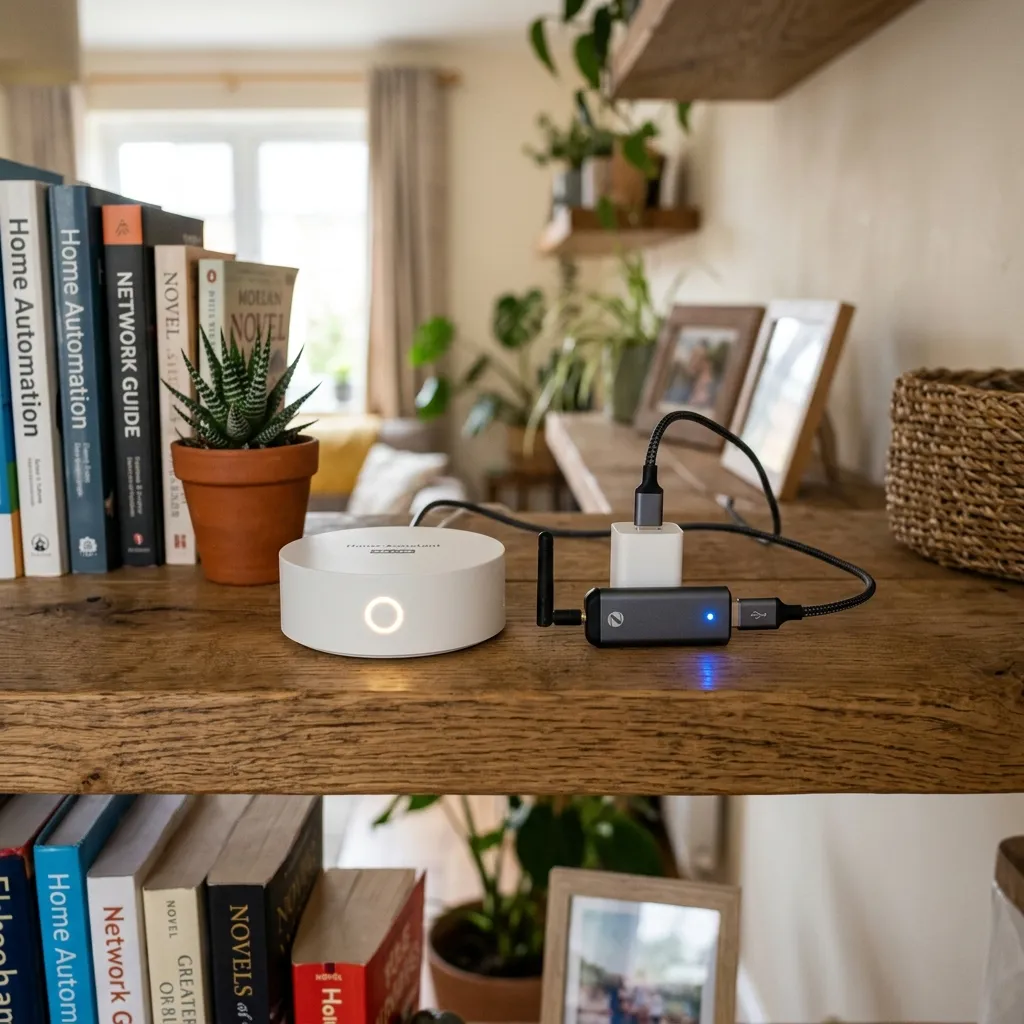
Home Assistant runs in Docker; the Zigbee stick is passed through to the container. I paired motion sensors, door sensors, and a bunch of bulbs and switches. Automations run on the server—no round-trip to the internet for “turn on the lights at sunset” or “notify when the garage door is left open.”
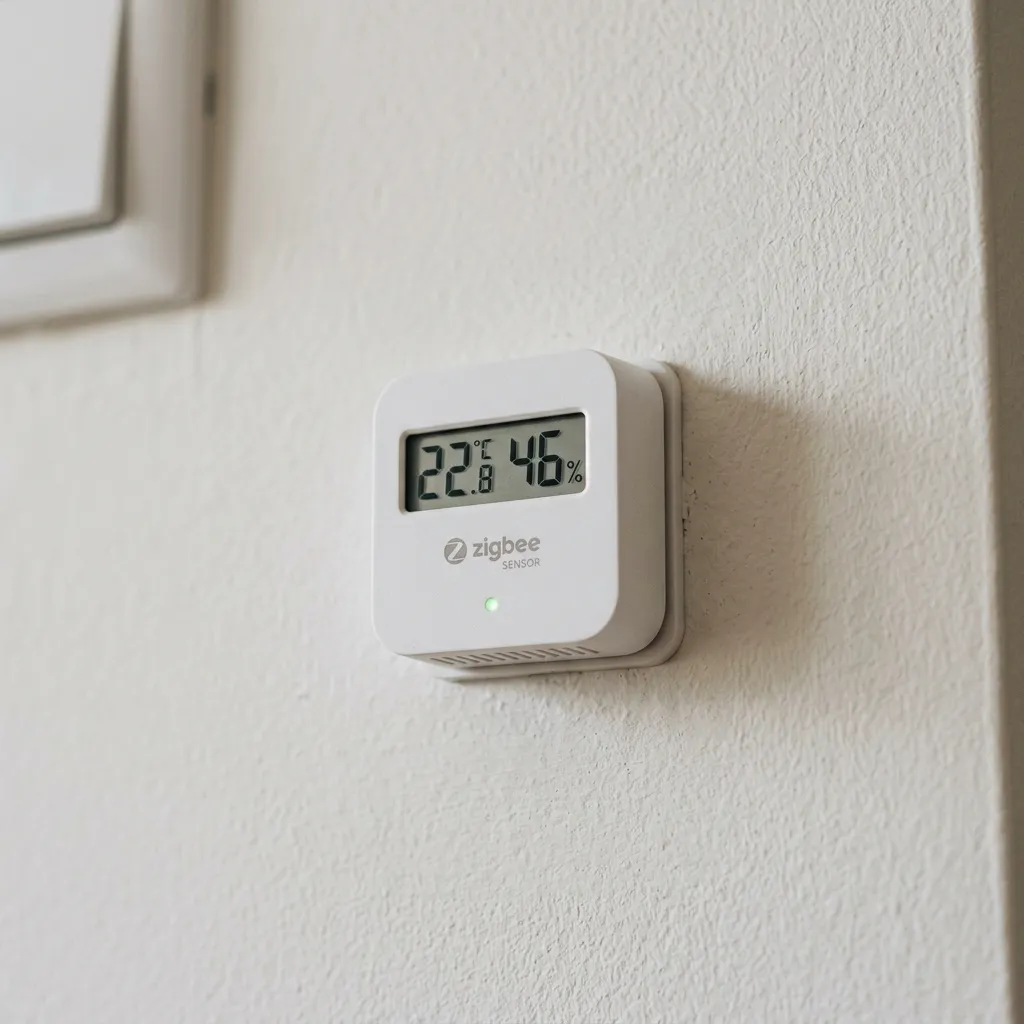
We have a simple dashboard on a tablet by the door and use the HA app on our phones. Everything works when the internet is down, and we’re not sending device data to a third party. Adding a new device is just pair and add to the dashboard.
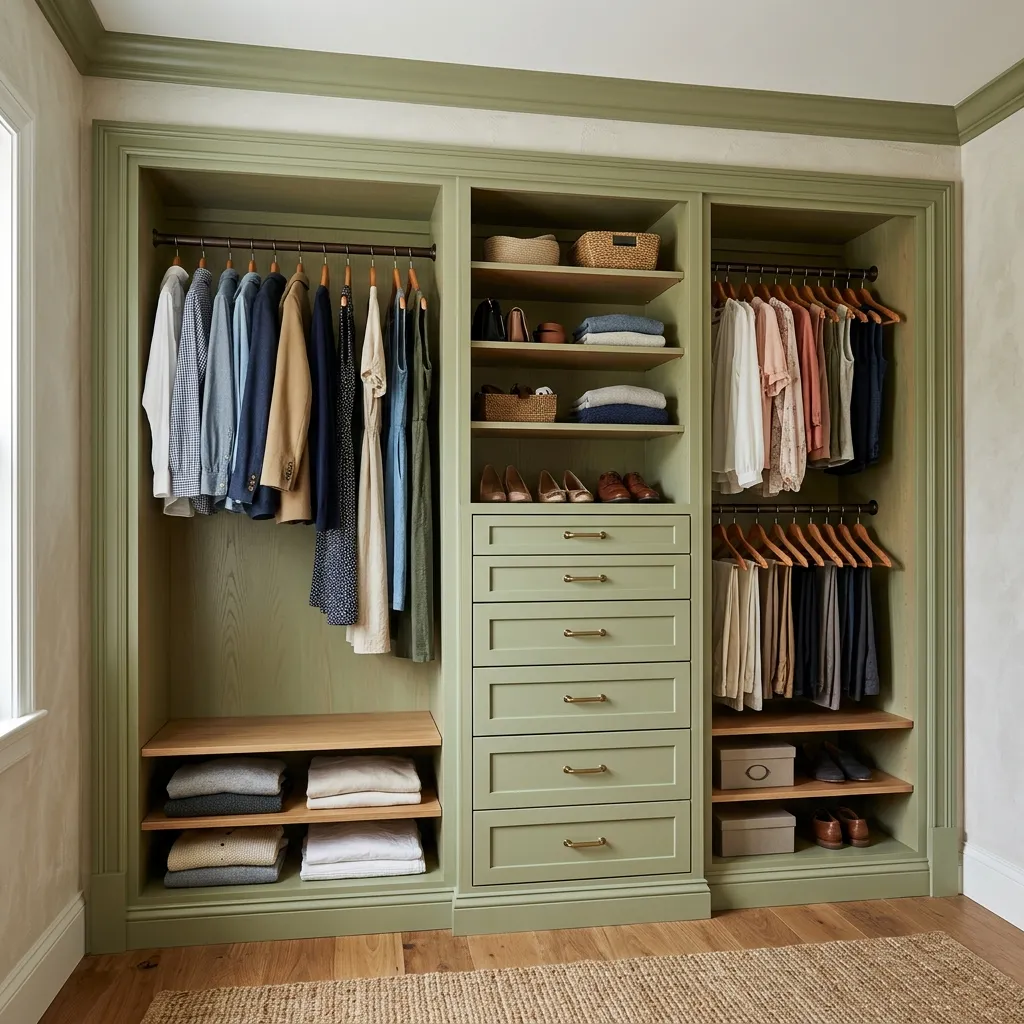
The master closet had a single wire shelf and rod. We wanted more hanging space, drawers, and shelves we could actually use. So we tore out the wire and built a custom layout with 3/4” ply and hardwood face frames.
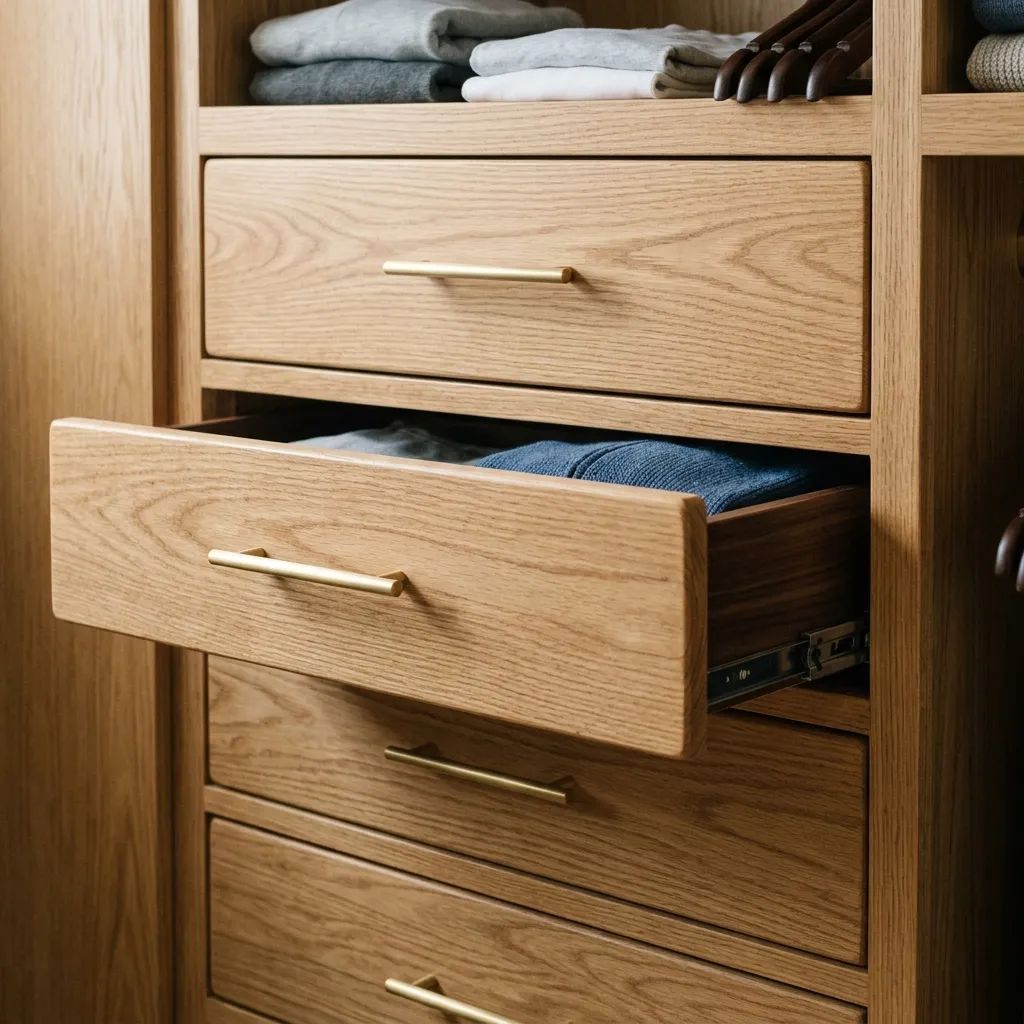
We split the closet into zones: double hang on one side, long hang on the other, and a bank of drawers in the middle. Shelves above the rods for bins and out-of-season stuff. Everything is painted to match the room; drawer fronts are 1x4 with simple pulls.
We gained a lot of usable space and the closet finally feels intentional. Build took about a week of evenings; the most tedious part was getting the drawer boxes square.
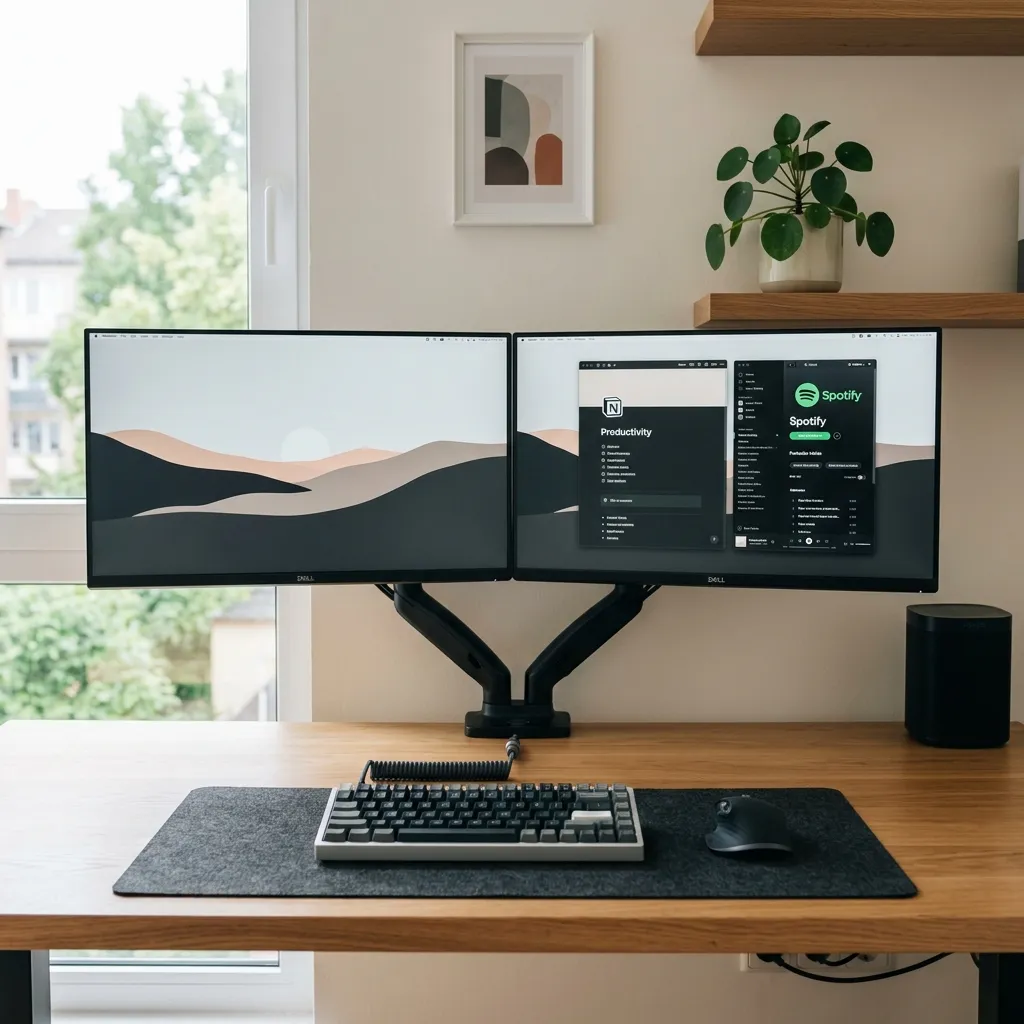
I was craning my neck at a laptop and a single monitor. I switched to dual monitor arms, a keyboard tray, and a few simple rules so the setup is adjustable and easier on my back and wrists.

I mounted two gas-spring arms on the desk and set the monitors at eye level, slightly tilted. The keyboard and mouse sit on a low tray so my elbows stay near 90°. The laptop is off to the side on a stand and used as a third screen when needed. I ran the cables through the arms and under the desk so nothing hangs.
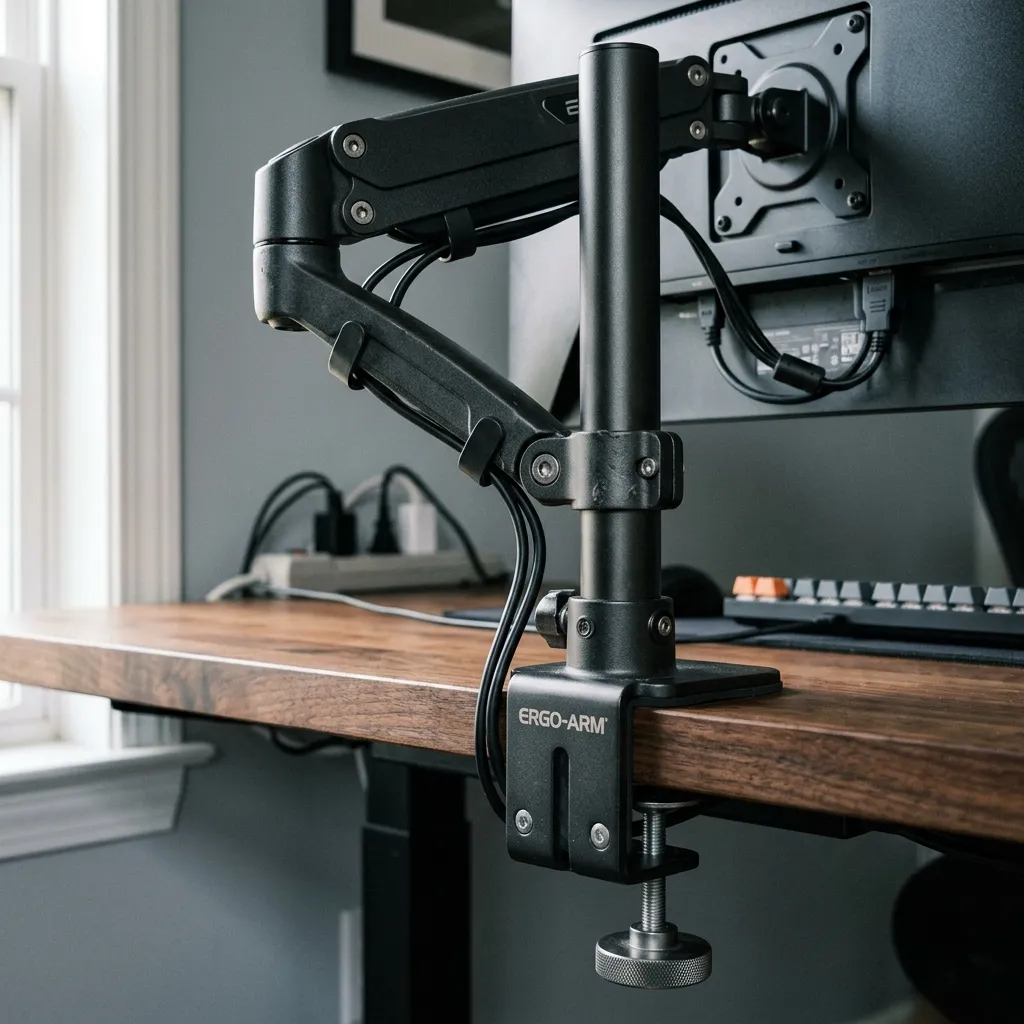
A footrest and a decent chair rounded it out. I don’t get the same neck and shoulder fatigue after long days, and the arms make it easy to tweak position without moving the whole desk.
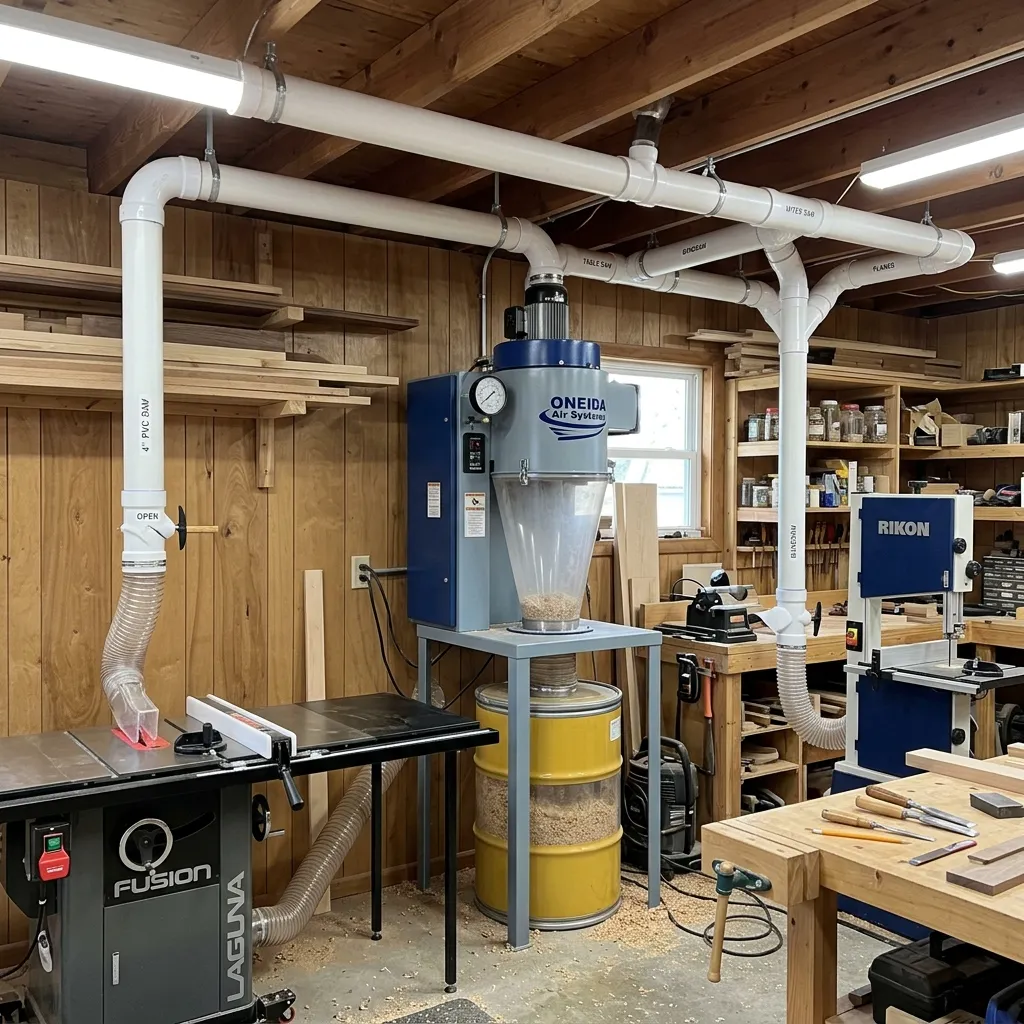
The shop vac was fine for hand tools but not for the table saw, planer, or router table. I upgraded to a 2HP collector and ran 4” PVC duct around the shop with blast gates at each drop.
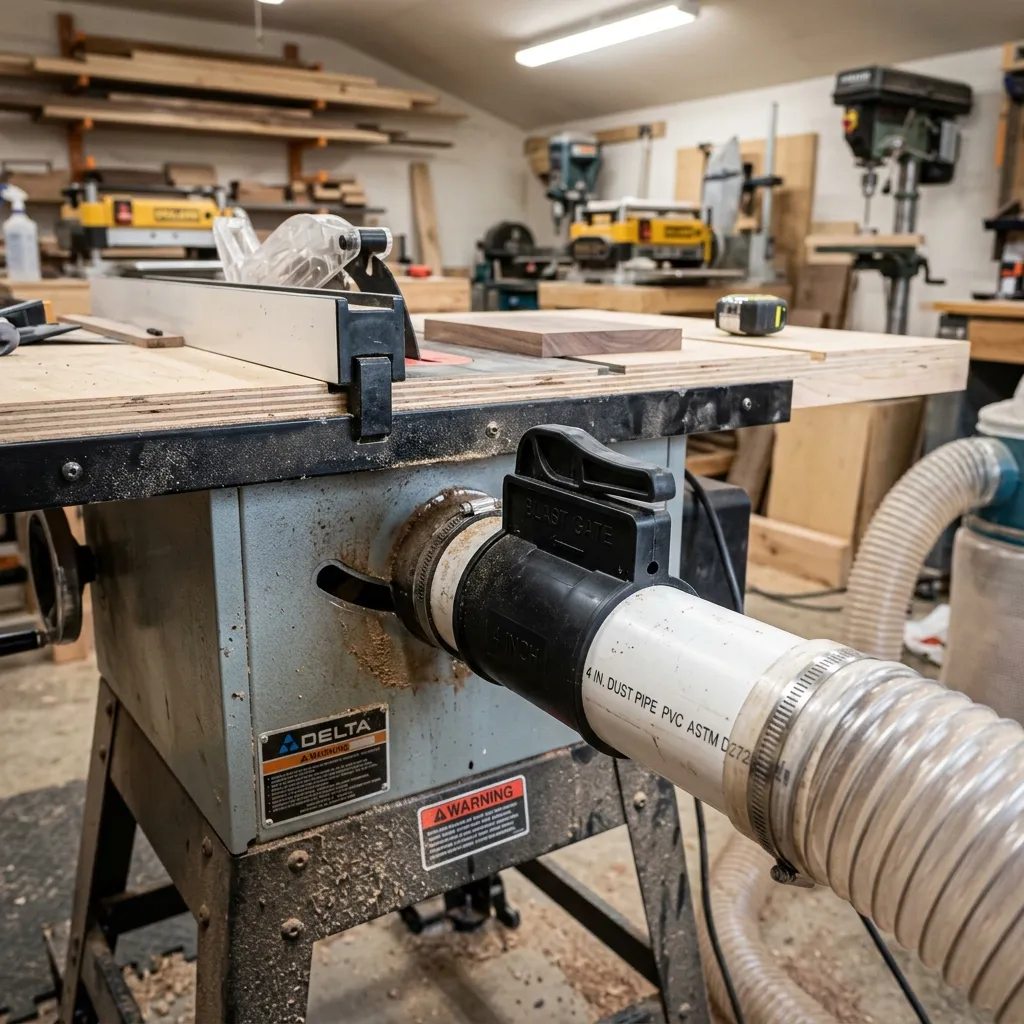
The collector sits in a corner with a short run to the first branch. I used schedule 40 PVC and proper HVAC fittings; each drop has a blast gate so I only open the one for the tool in use. The table saw and planer get 4” flex to the cabinet ports; the bandsaw and router table share a branch with a wye.
The difference is huge. Chips and fine dust go to the collector instead of the room. I still wear a mask for long sessions, but the air stays much cleaner and cleanup is faster.
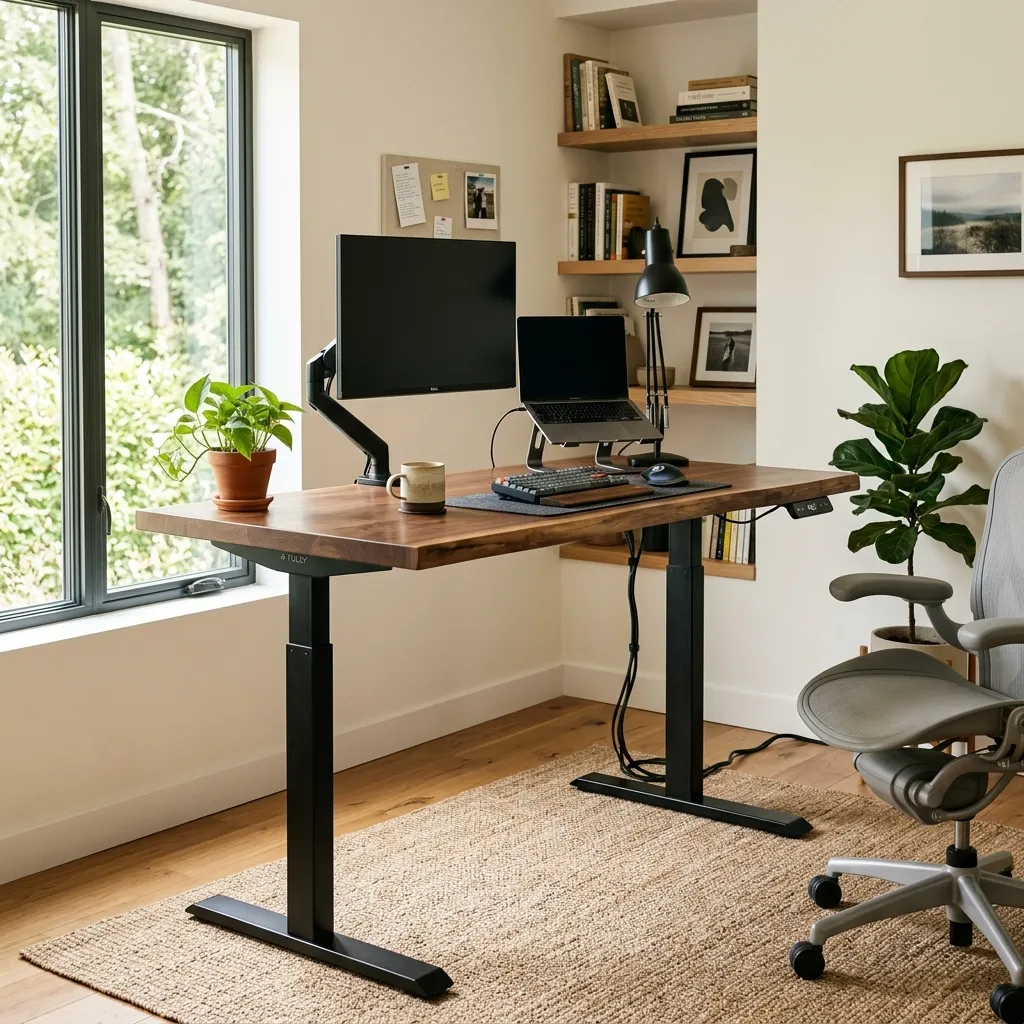
I wanted a standing desk with a real wood top and a frame that could go up and down without sway. I bought a dual-motor frame and built a 1.5” thick hardwood top to bolt to it.
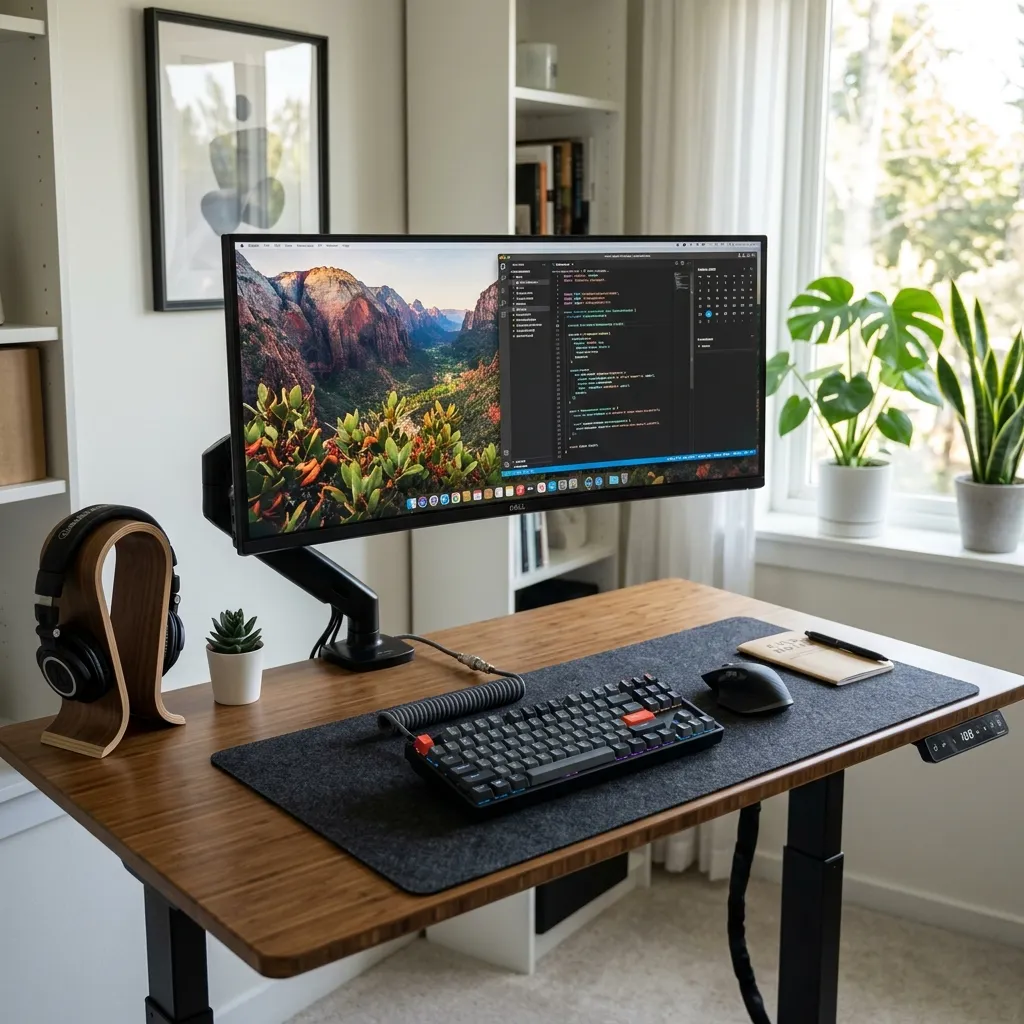
The top is two layers of 3/4” maple edge-glued and face-glued, then planed and sanded. I rounded the edges with a router and finished with oil and wax. The frame’s mounting plate required a few holes; I drilled and counterbored so the bolts sit flush. Cable management runs through a grommet and under the desk.
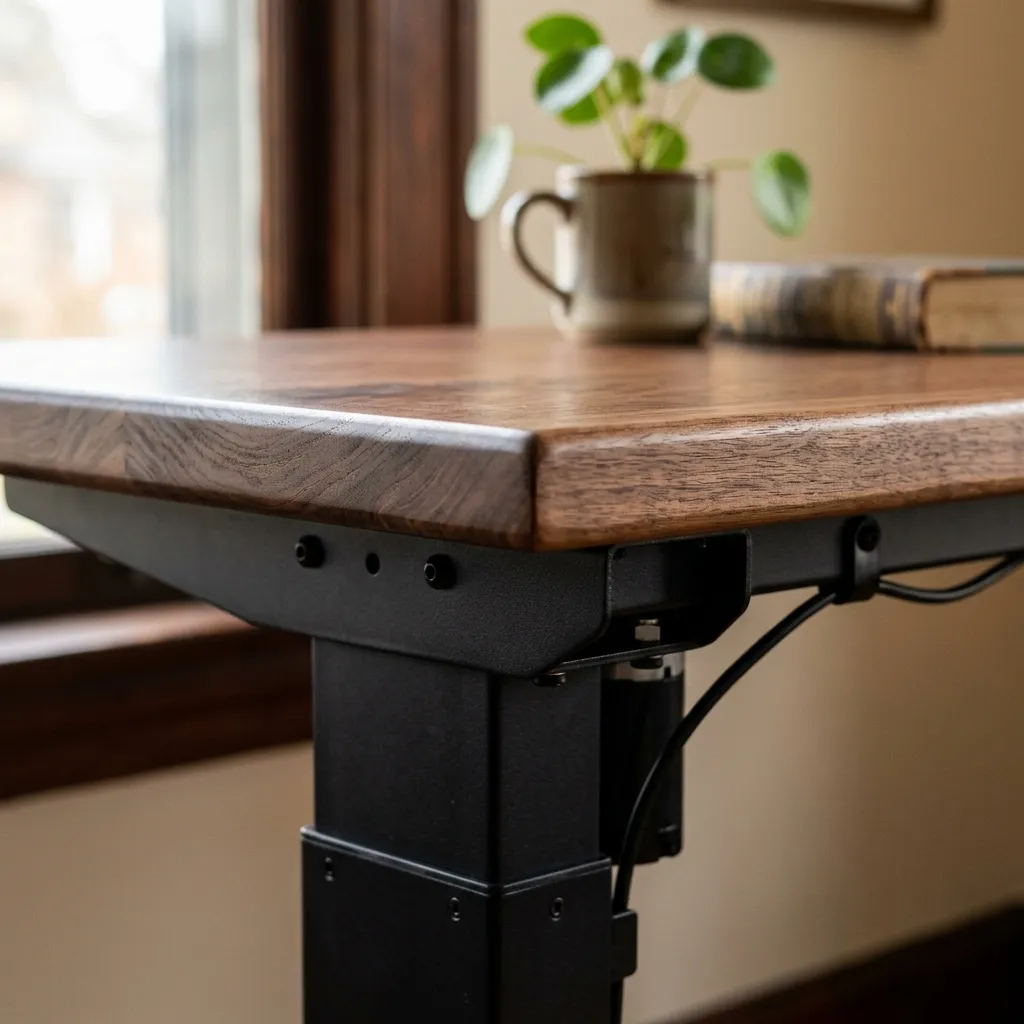
The desk goes from 28” to 48” and stays stable at full height. The top is 60x30”—enough for two monitors and keyboard. Total cost was less than a comparable prebuilt, and the top can be refinished or replaced if we move.
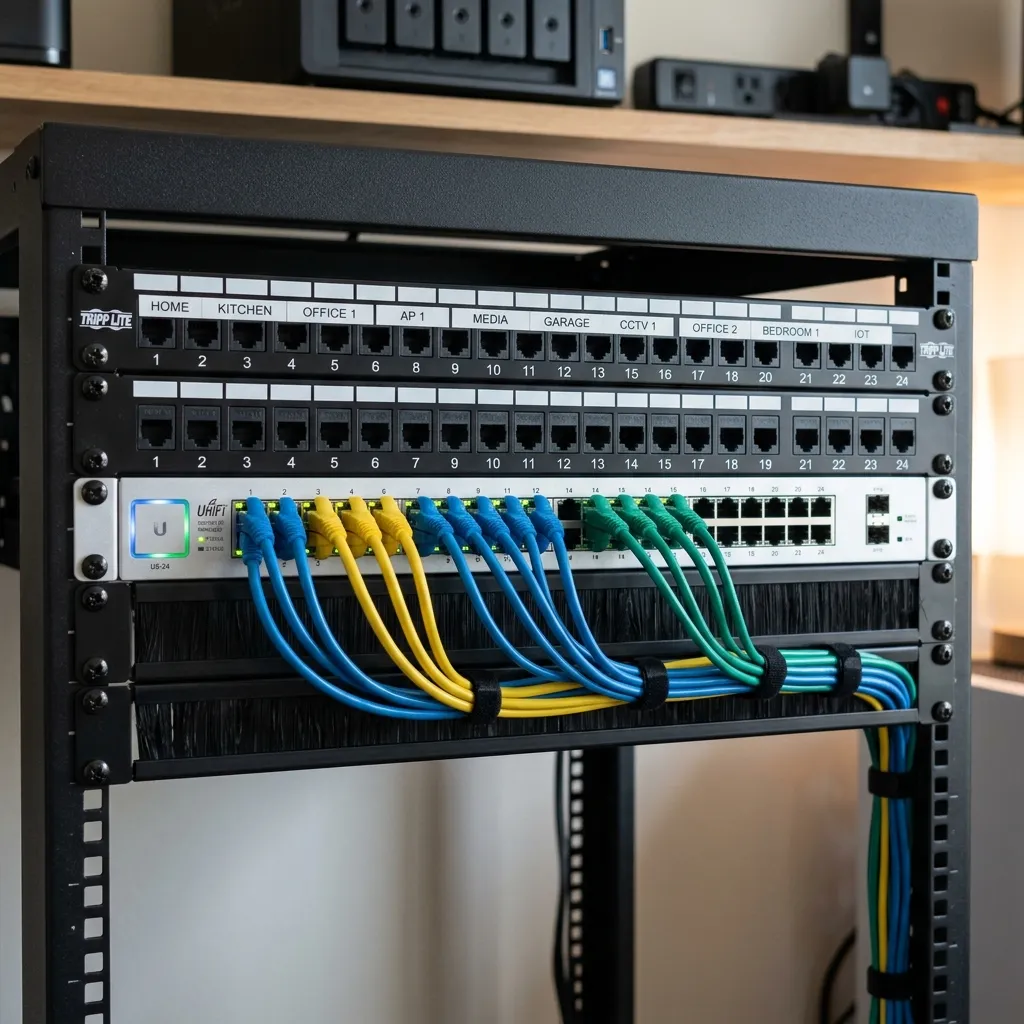
We had Cat6 in the walls but no central place to land it. I added a small wall-mount rack in the utility room with a patch panel, a PoE switch, and a patch cable to the router. Now every drop is labeled and everything is in one place.

The panel has 24 ports; I punched down the room cables and ran short patch cables to the switch. The router sits above the rack and connects to the switch; the modem is nearby. Cable management bars keep the front tidy and make it obvious which patch goes where.
We have wired backhaul for mesh nodes, a drop for the office, and one for the TV. Speeds are solid and I didn’t have to run new cable—just terminate and organize.
The shed had no power. I wanted lights and a couple of outlets for tools and a small heater in winter. So I ran a dedicated circuit from the main panel to a small subpanel in the shed, with everything in conduit and GFCI where required.
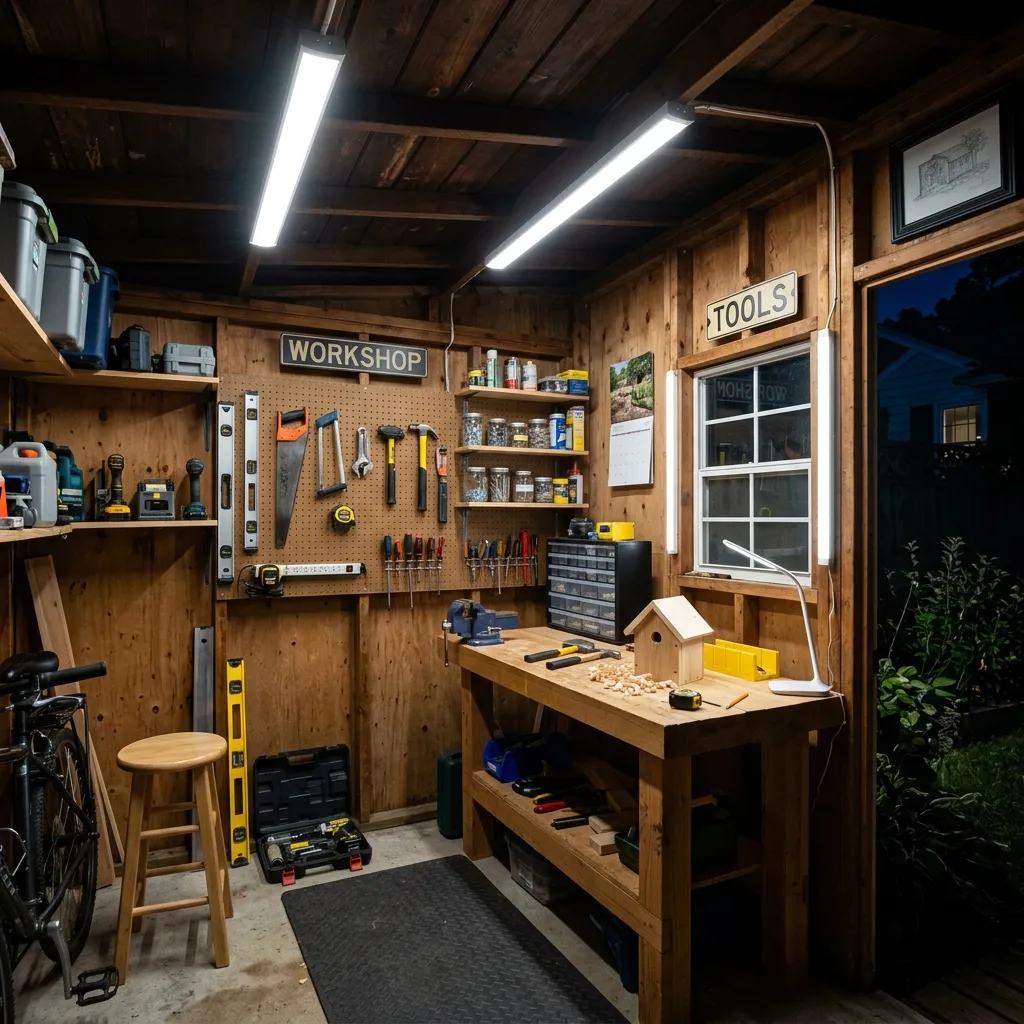
I dug a trench from the house to the shed and ran UF cable inside PVC conduit. At the shed I mounted a small subpanel with a couple of breakers: one for general outlets (GFCI at the first outlet), one for lights. I used outdoor boxes and covers and made sure the grounding was continuous.
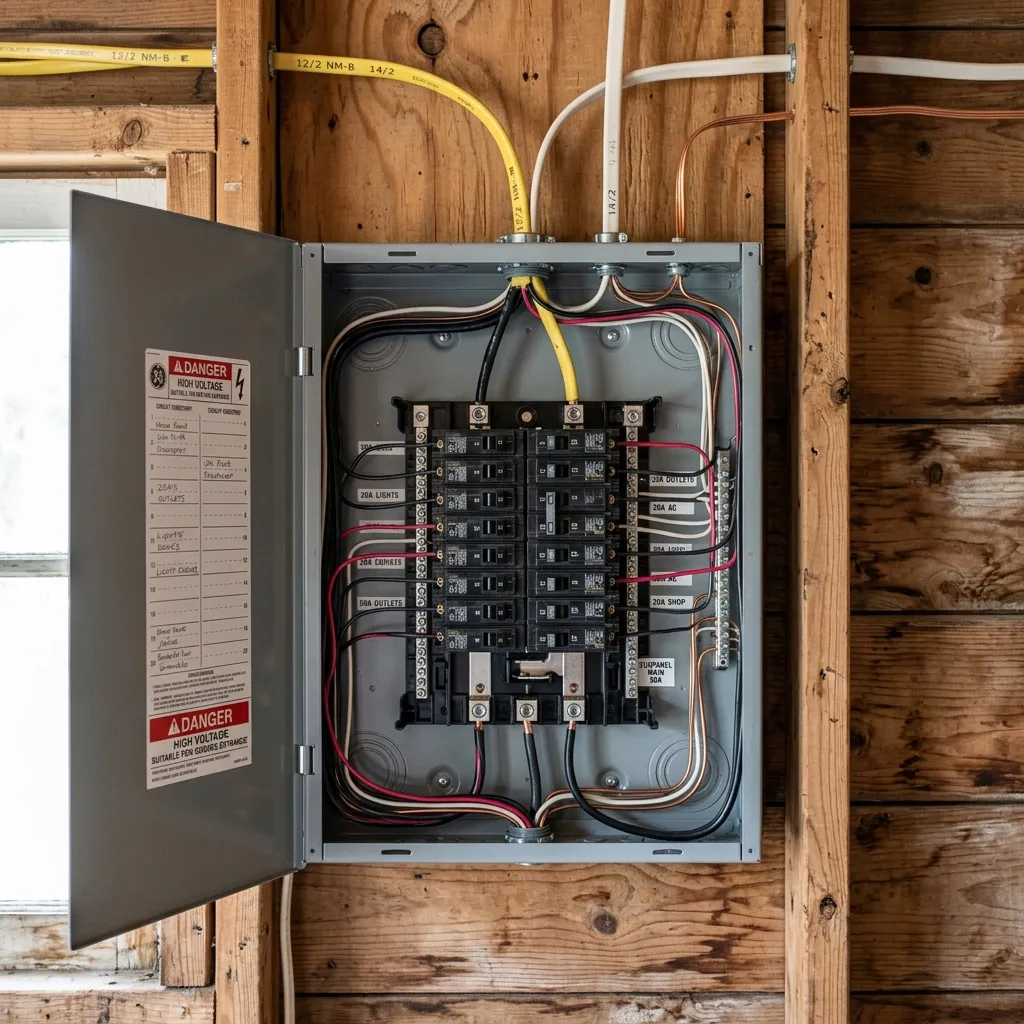
The work was permitted and inspected. Now the shed has overhead LED strips and two duplex outlets, and I can run a space heater or a charger without extension cords from the house.
The deck was gray and splotchy. We wanted color and UV protection without hiding the grain. So we cleaned it, applied a brightener, and put down two coats of semi-transparent oil-based stain.
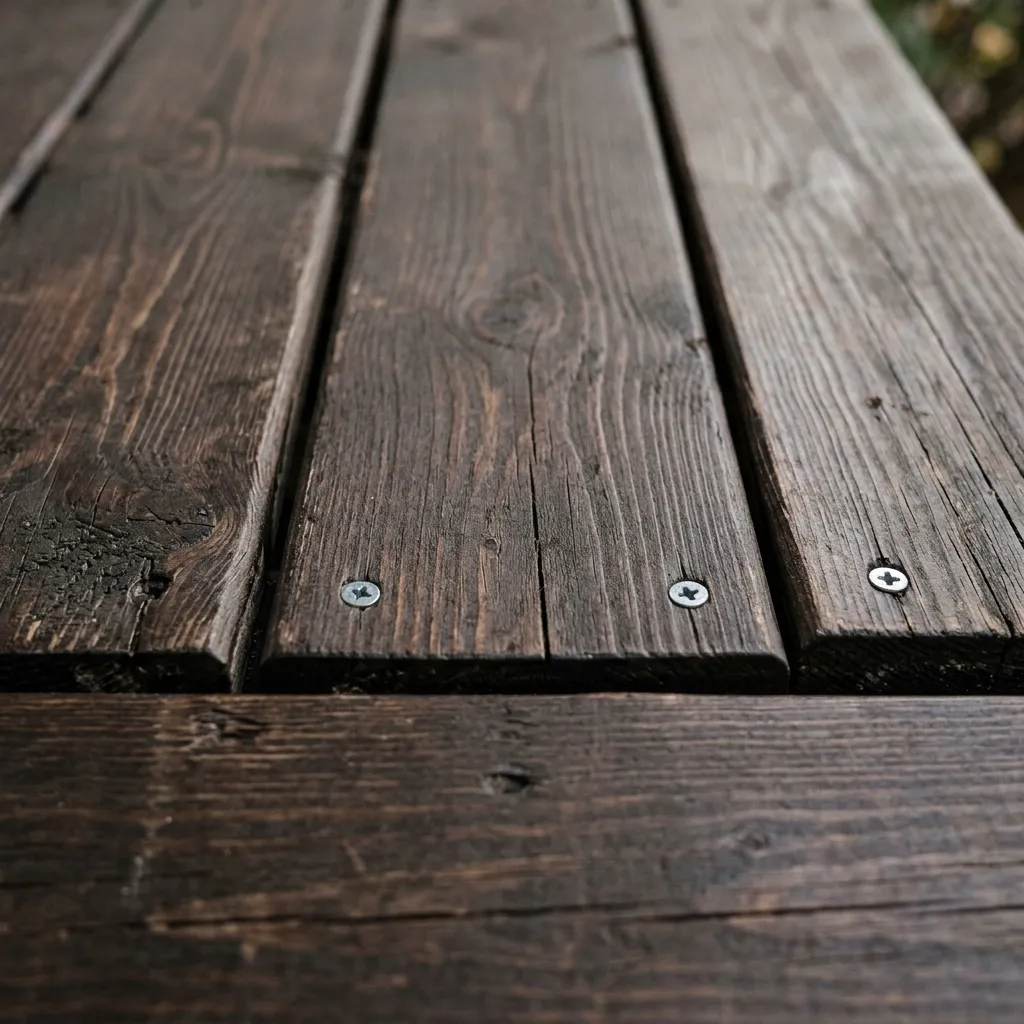
First pass was a deck cleaner and a stiff brush; then we rinsed and let it dry. The brightener brought the wood back to a consistent tone. After another rinse and a couple of dry days, we rolled and brushed the first coat of stain, waited 24 hours, and applied the second. We did the railings with a brush for control.
A year in, the color has held and water still beads. We’ll re-coat in another year or two depending on wear. Doing it in July gave us long dry times and no frost risk.
We had a corner by the stairs that collected junk. We turned it into a small study nook: a built-in desk, a few shelves, and an outlet strip so a laptop and lamp don’t need extension cords.
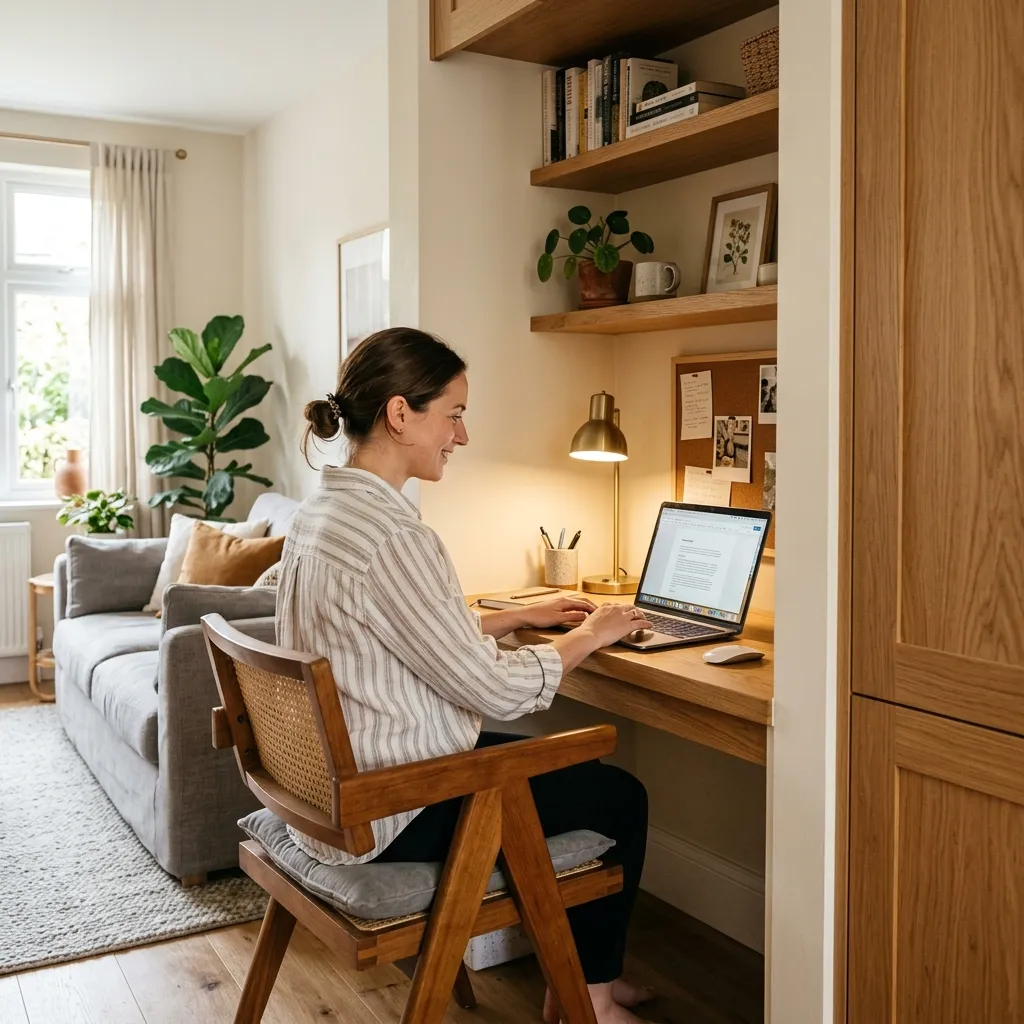
The desk is a 1” hardwood top on a simple base—two sides and a center support, all painted. The shelves above are 1x8 on brackets, same finish as the trim. I ran a single circuit to a quad outlet behind the desk and added a small LED task light.

It’s now the default spot for homework and video calls. The nook feels intentional instead of leftover space, and we didn’t have to give up a whole room.
The old vanity was 30” of particleboard and a drop-in sink. We wanted a single vessel sink, more drawer space, and a counter that wouldn’t swell when it got wet. So we built a new cabinet and topped it with quartz.
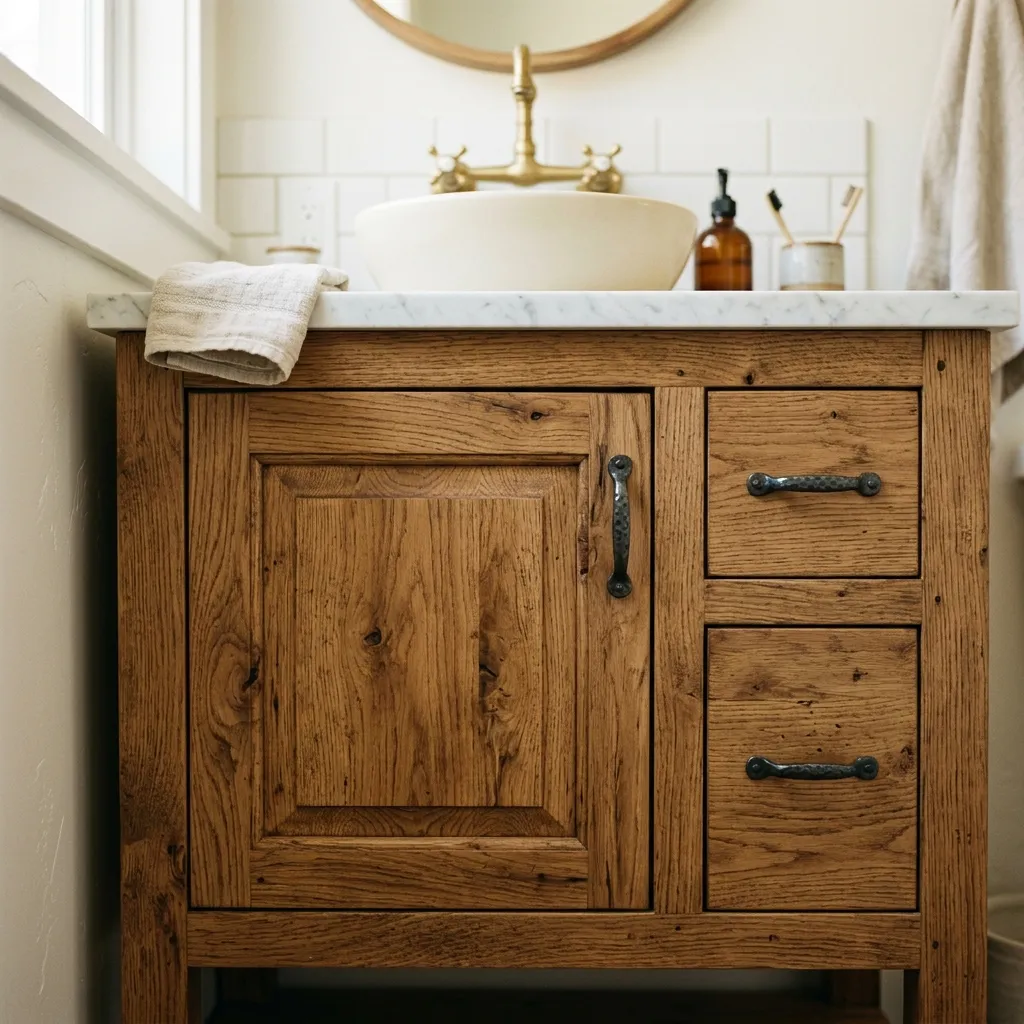
I built the cabinet from 3/4” ply with a face frame and soft-close drawers. The top is a remnant slab with a cutout for the vessel; the plumber set the faucet and drain. We kept the same rough-in so no wall work was needed.
Paint matches the trim; the new pulls tie into the rest of the bathroom. We gained a full-width drawer and a deeper cabinet. The whole thing took a weekend plus the counter measure and install.
I was tired of handheld routing for long edges and dados. A proper router table with a good fence and a lift made sense, so I built the cabinet and bought a cast-iron top and insert plate.
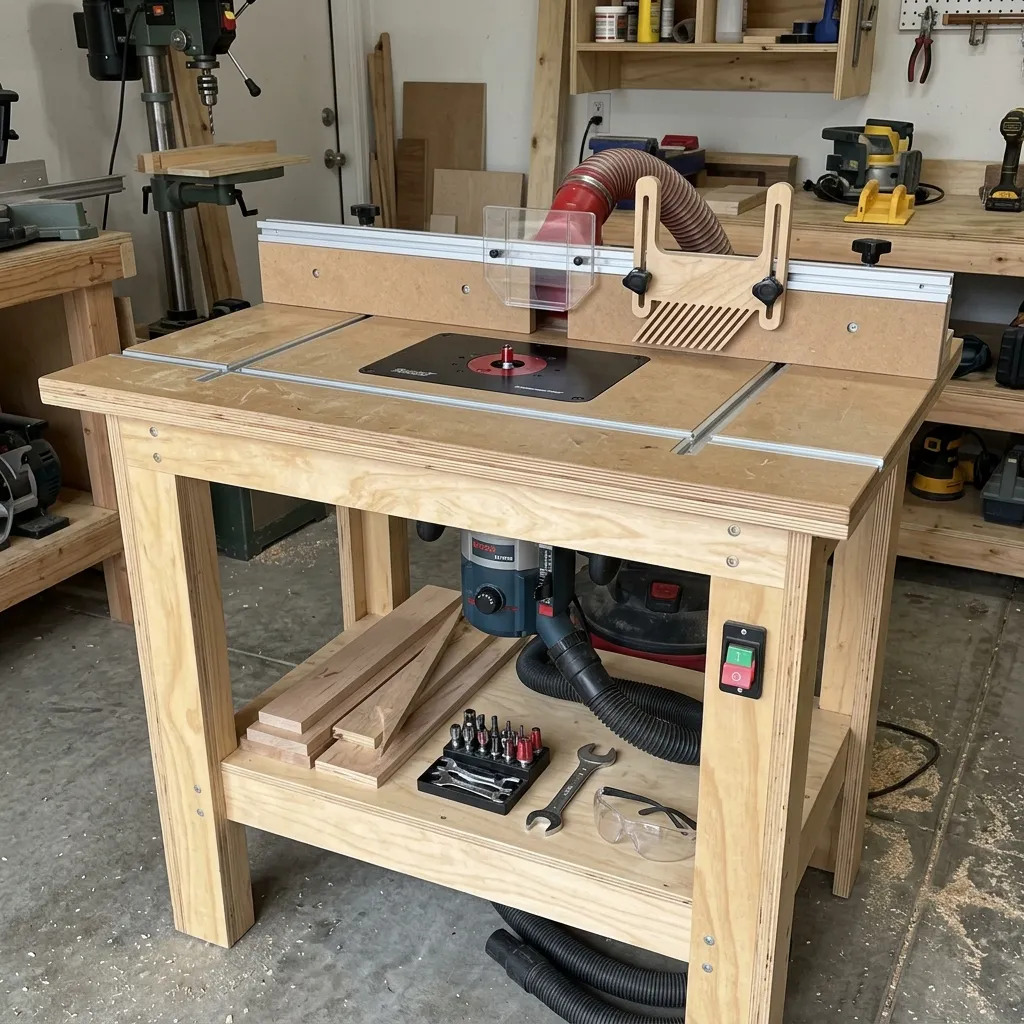
The base is a simple cabinet: 3/4” ply carcase, drawer for bits and wrenches, and open storage below. The top is a standard 24x32” cast-iron router table top with a phenolic insert; I mounted a compact router lift so bit height is adjustable from above. The fence is a two-piece design with T-track for hold-downs and a replaceable facing.
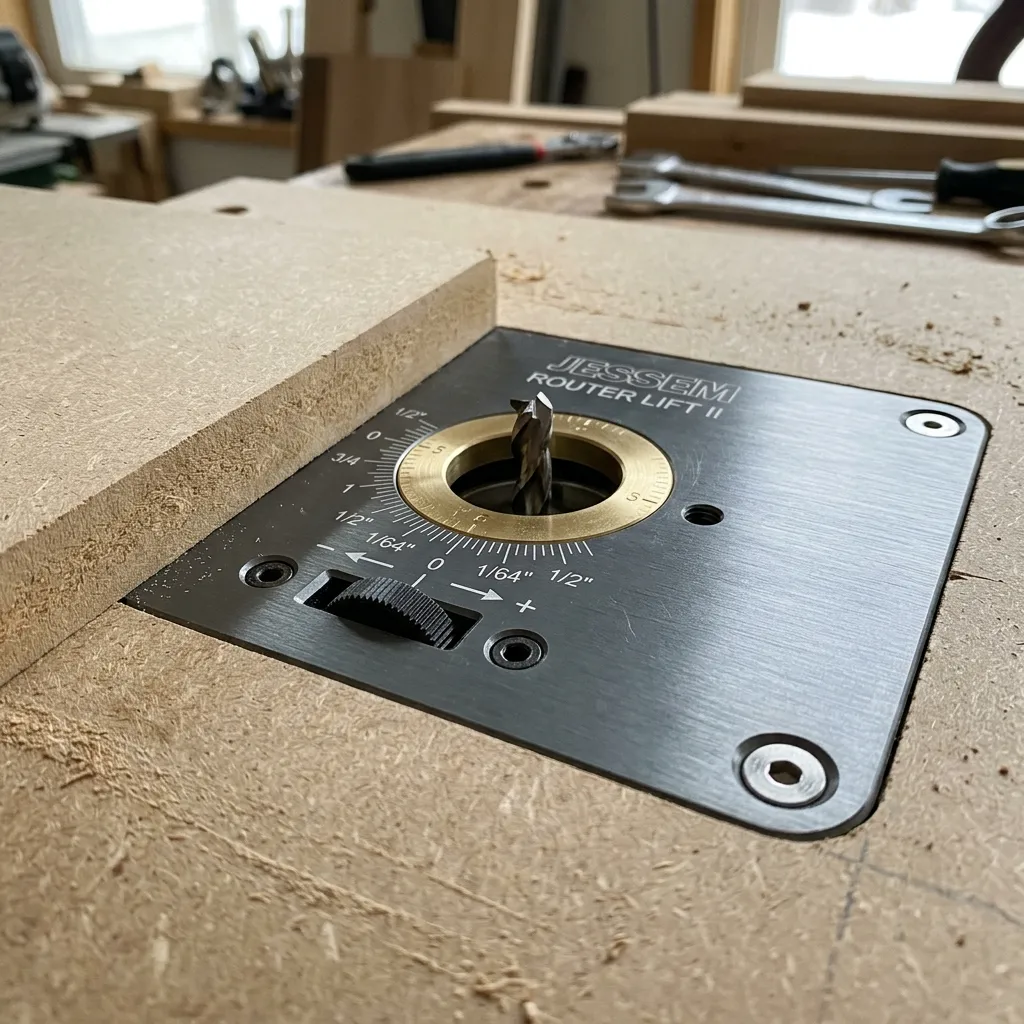
Dadoes, rabbets, and edge profiles are now repeatable and much safer. Dust collection hooks up to the fence and the cabinet. Total cost was less than a mid-tier prebuilt table, and it’s sized for the shop.
The home office needed storage that didn’t crowd the desk. I built three floating shelves out of 1x8 maple and mounted them on heavy-duty hidden brackets so they read as clean slabs on the wall.
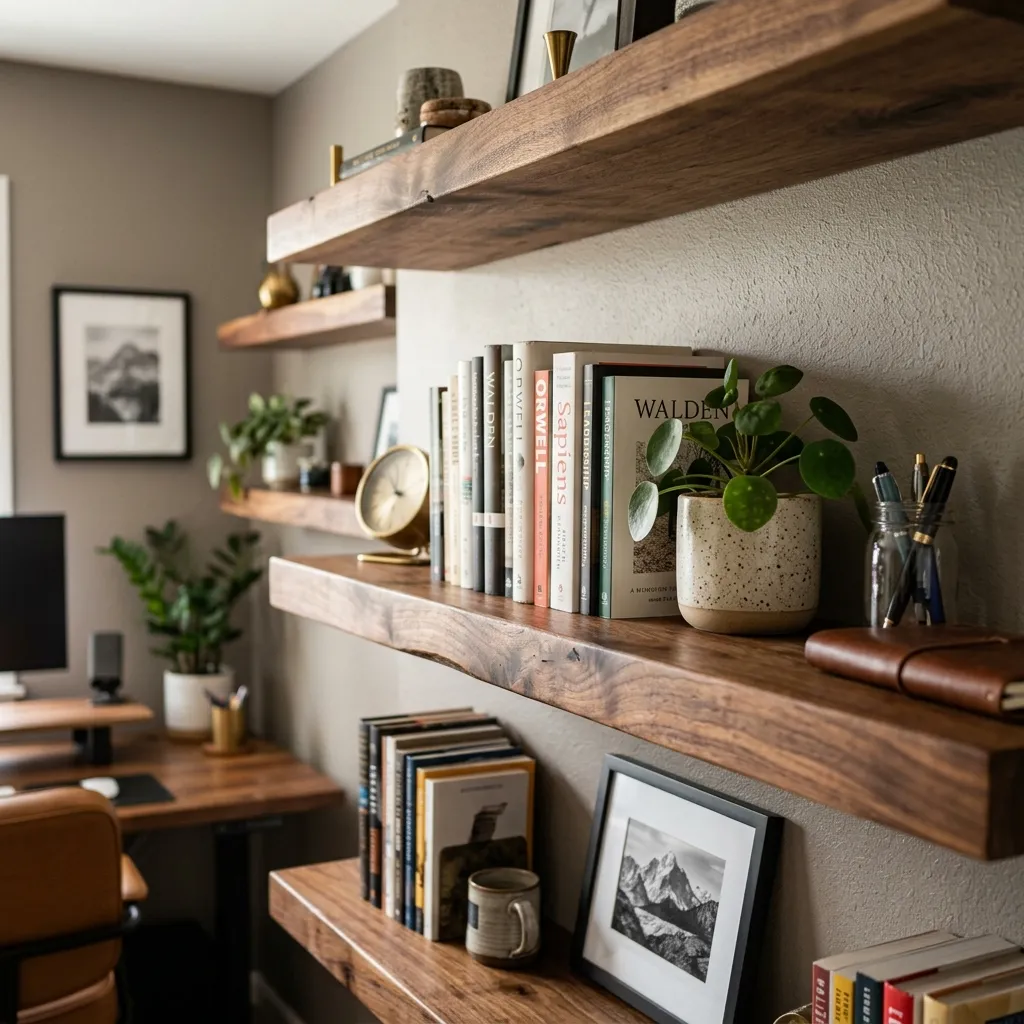
Each shelf is a single board, sanded and finished with wipe-on poly. The brackets bolt into studs; the shelf slides over the bracket and is pinned from below so there are no visible fasteners from the front. I used a level and a story stick to keep the spacing even.
They hold books, a few plants, and some small gear. The look is minimal and the office feels bigger. Next time I’d make the shelves a bit deeper for larger binders.
The garage slab was stained and dusty. I wanted something that would shrug off oil, sweep easily, and look like a real shop floor. A two-part epoxy system with decorative flakes fit the bill.
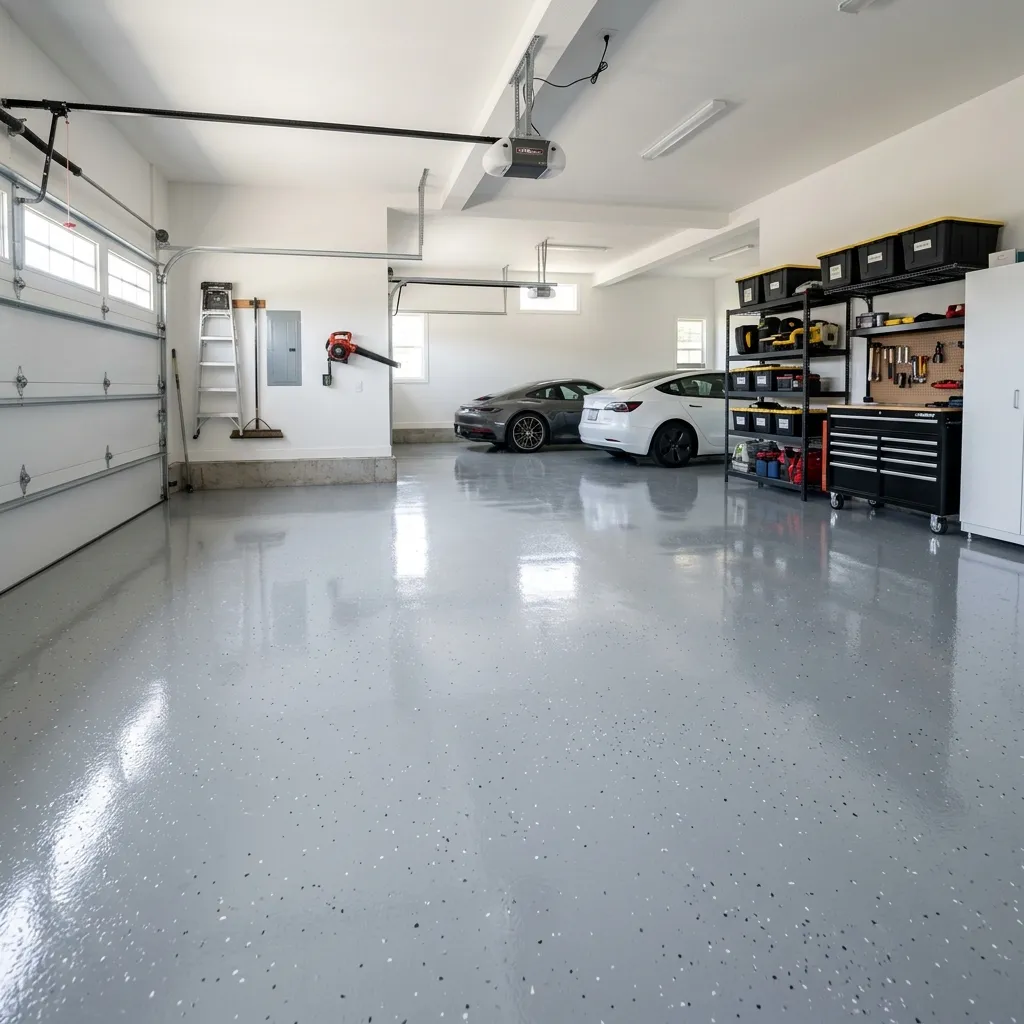
Prep was most of the work: pressure wash, etch with acid, fill cracks, and let it dry for a few days. I used a kit that included primer, color base, and clear topcoat. After the primer cured, I rolled the base coat and broadcast the flakes by hand so the coverage was even. The next day I swept off loose flakes and applied the topcoat.
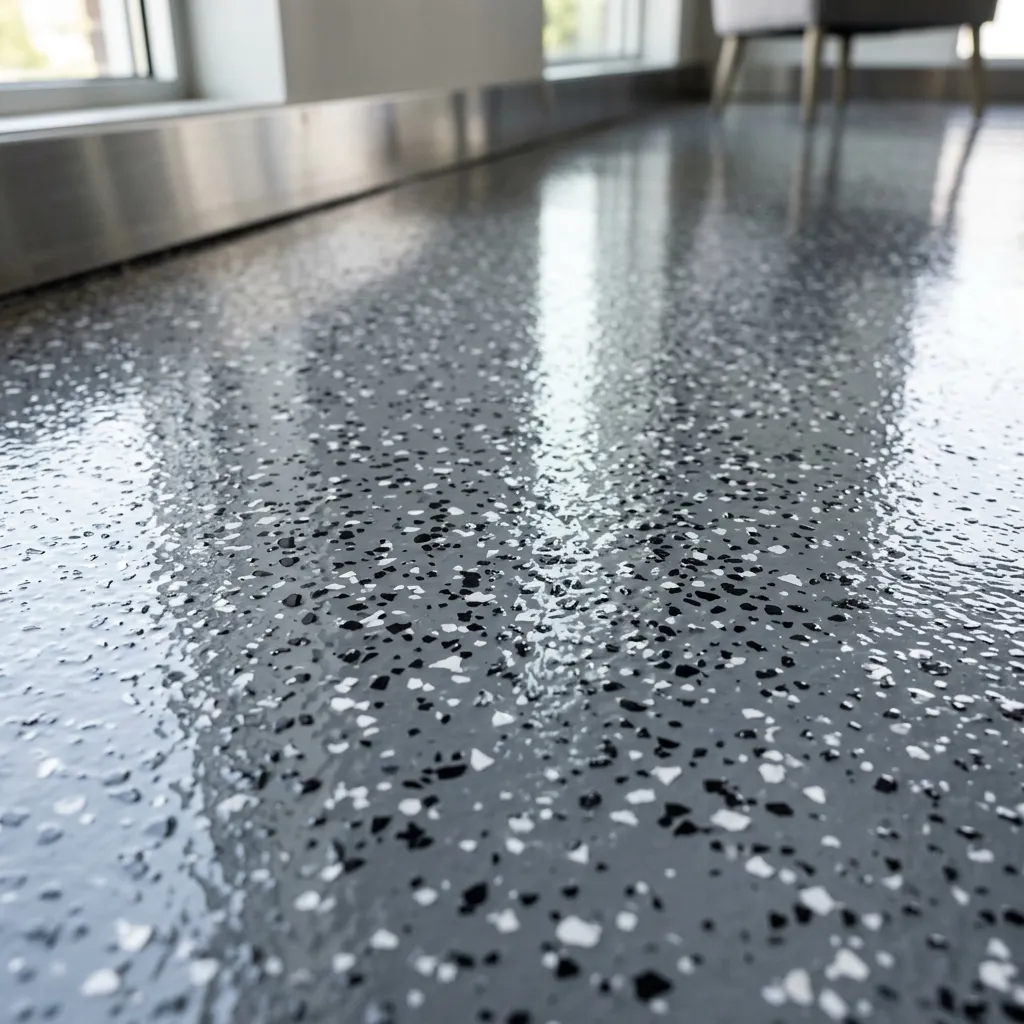
The floor has held up to jack stands, spills, and winter salt. Sweeping and occasional mopping keep it clean. If I did it again, I’d rent a concrete grinder for any really rough spots before priming.
Wires were everywhere: monitors, laptop, lamp, speakers, and a tangle of USB and power. I wanted one clean run to the wall and nothing dragging on the floor. Here’s what worked.
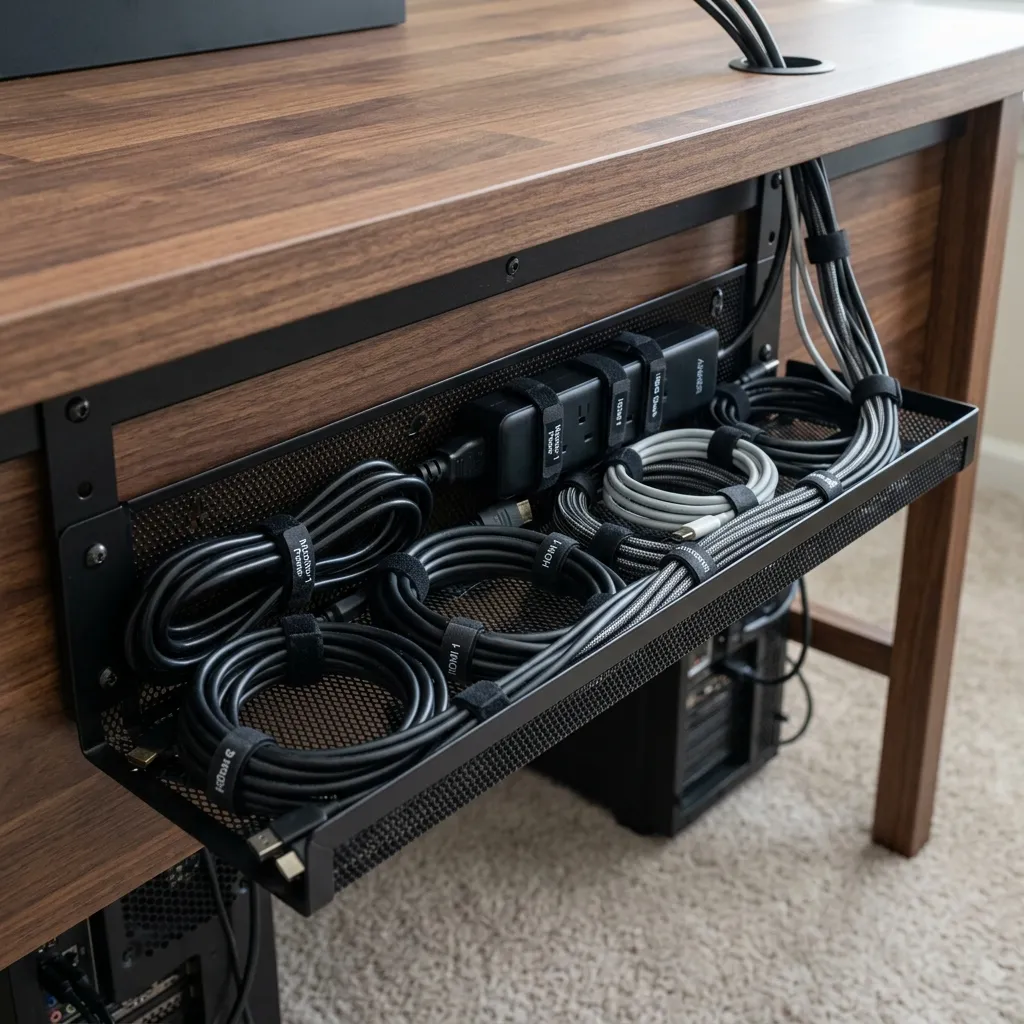
I mounted a metal cable tray under the desk and ran all cables through it toward one corner. A single power strip lives in the tray; the laptop and peripherals plug into a powered USB hub so only the hub cable and power cord go down to the outlet. Velcro straps every few inches keep everything in place.
I added a short extension for the desk lamp and labeled the power strip so I can kill everything with one switch. Under-desk is now invisible from the sitting side, and unplugging for a move is straightforward.
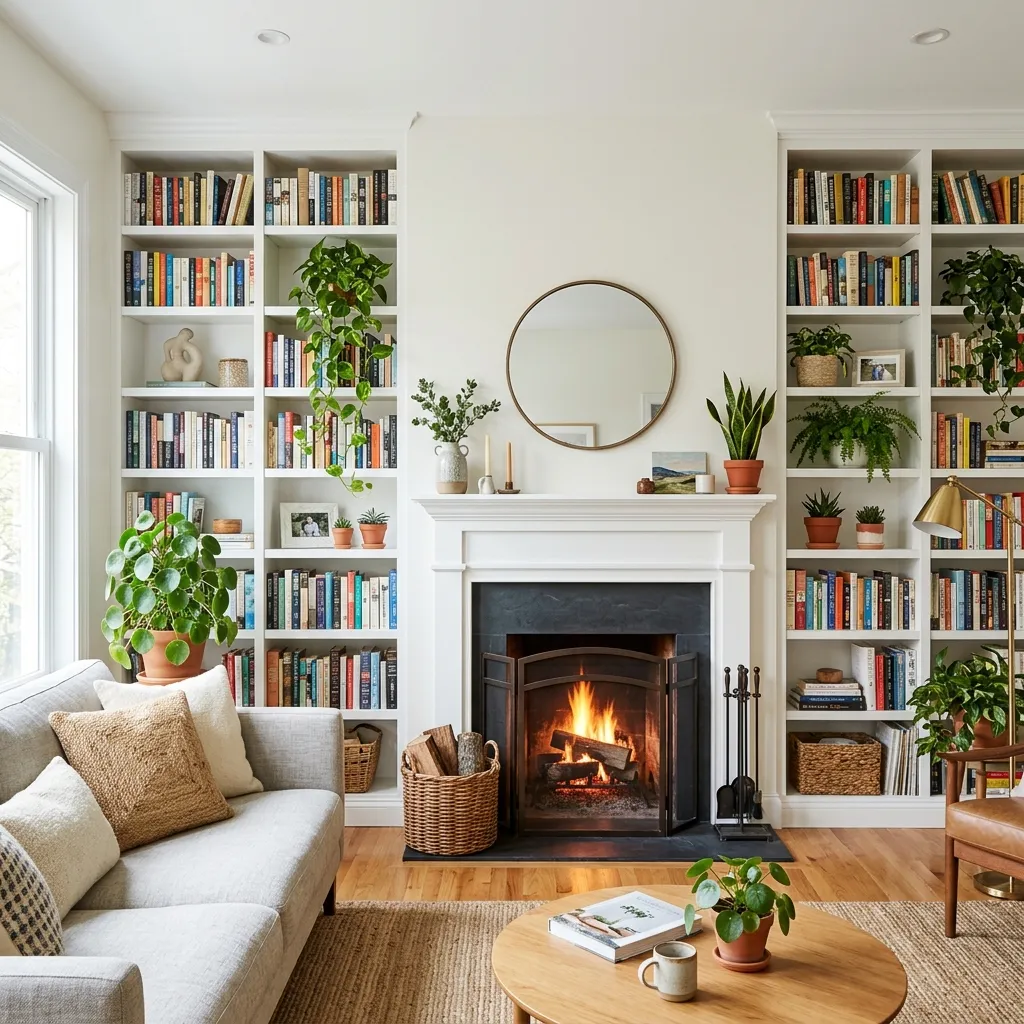
The living room had a blank wall and a TV on a stand. We wanted storage and a focal point, so we built floor-to-ceiling shelves around the fireplace and integrated the TV into the unit.
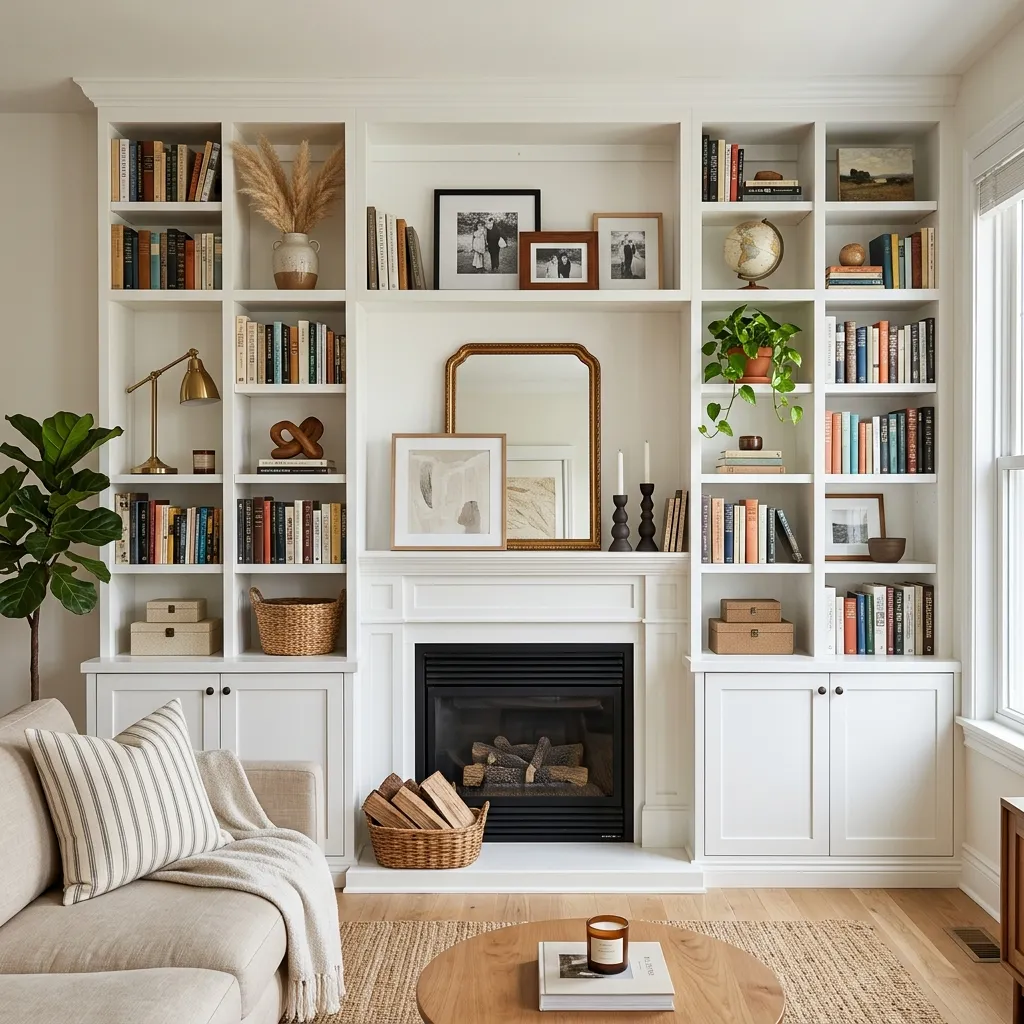
The structure is 3/4” ply boxes with 1x2 cleats and face frames. Shelves are 1x10 pine, supported every 32” and finished with oil-based poly. We left one bay open for the TV and ran power and HDMI through the wall into a small cabinet below.
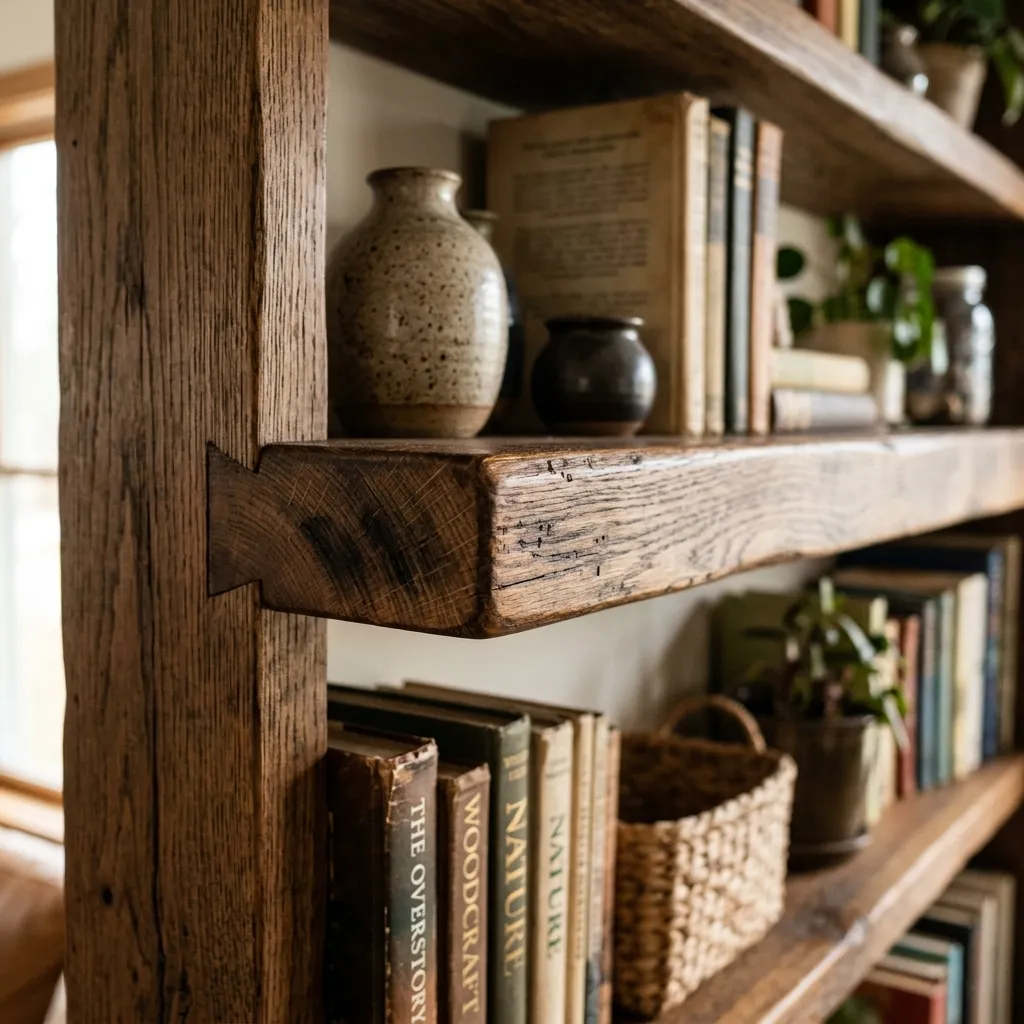
Paint matched the existing trim; the mantel stayed as-is. We use the lower shelves for media and baskets, the upper ones for books and plants. It took about three weekends and completely changed how the room feels.
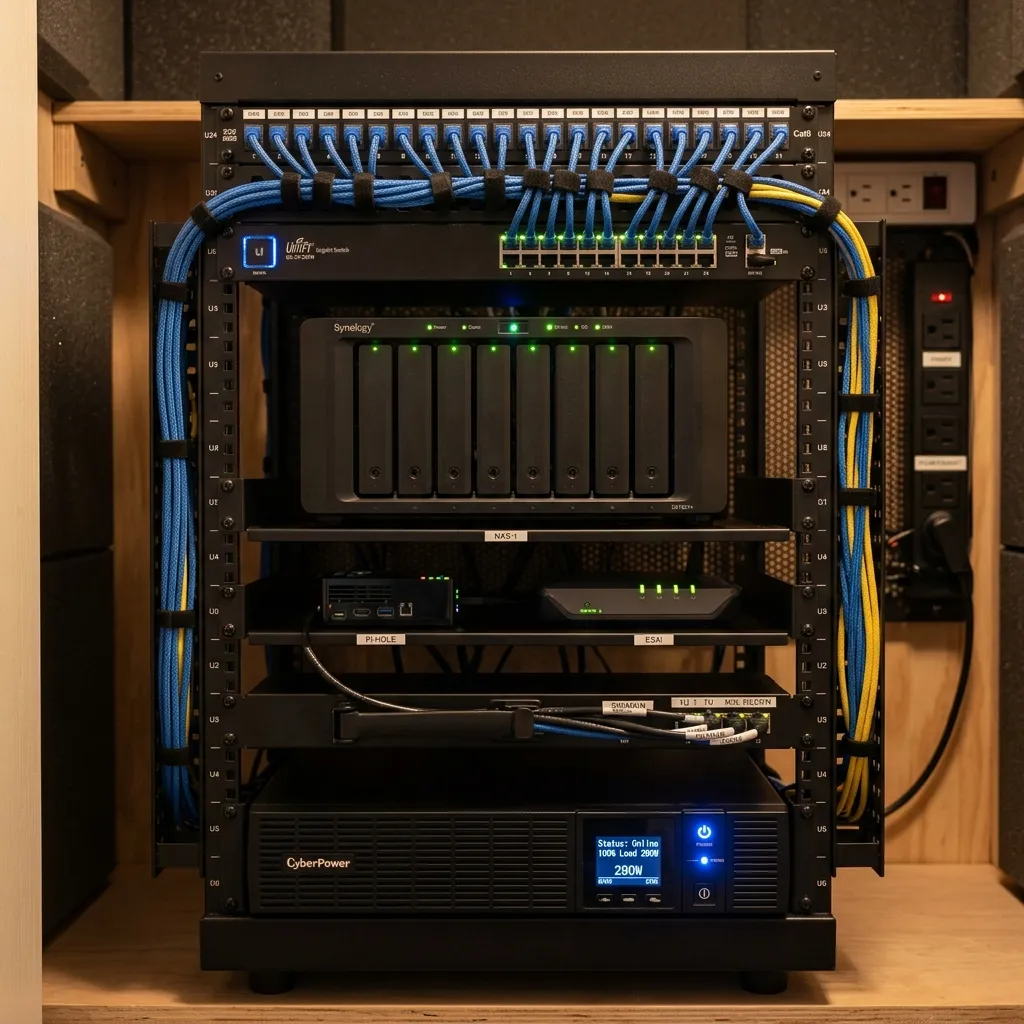
I wanted one place for family photos, backups, and a few self-hosted services—without paying a cloud tax every month. So I turned an old desktop and some spare drives into a simple home server running TrueNAS (now Scale) in a VM and Docker for everything else.
The host is a refurbished business PC with an i5 and 32GB RAM. I added a multi-bay enclosure for the data drives and set up ZFS mirroring for the important datasets. Backups go to the NAS from our laptops on a schedule; photos and media are served to the rest of the house over the LAN.
I run Pi-hole in a container for network-wide blocking, plus a couple of small web apps. Everything backs up to an external drive weekly. Power draw is low, and the whole setup lives in a closet with decent airflow.
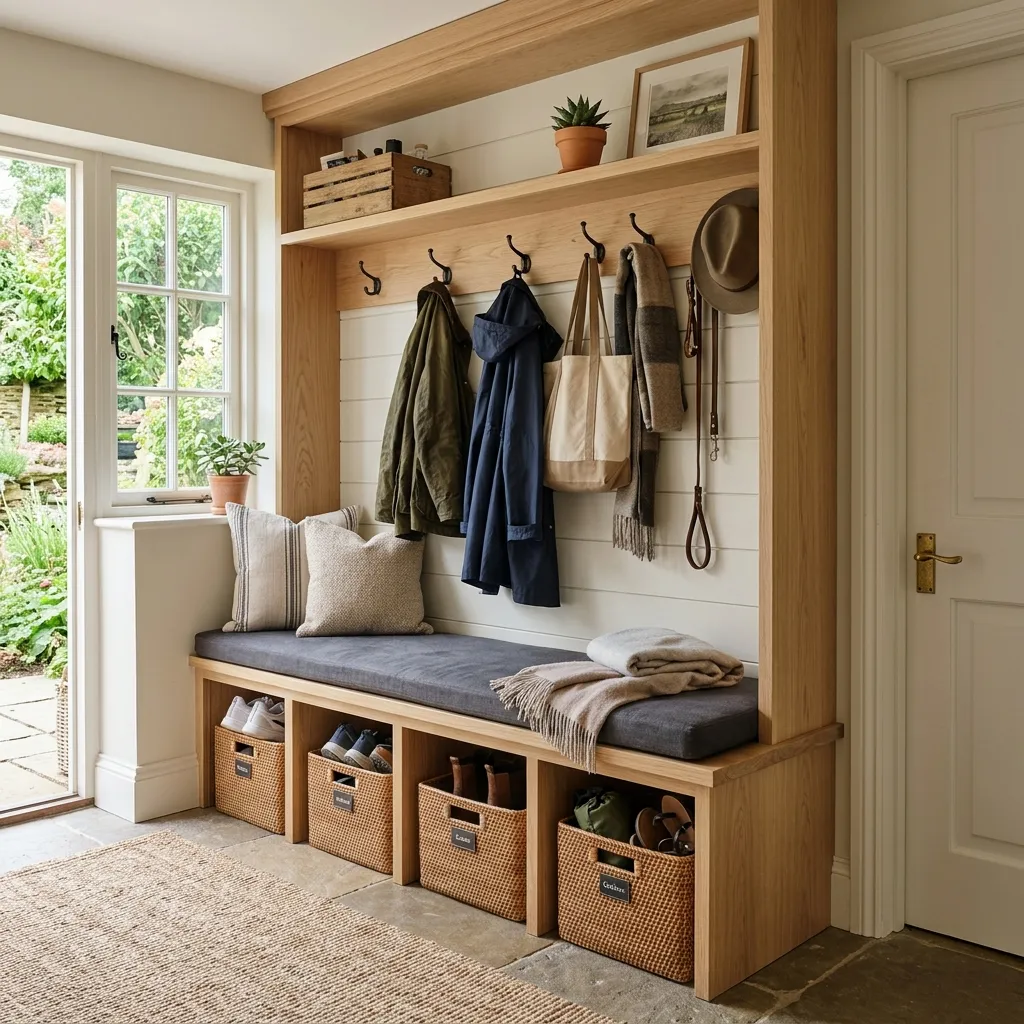
The back door was a dumping ground for backpacks and boots. We needed a place to sit, stash shoes, and hang coats without turning the mudroom into a closet. This bench does all three.
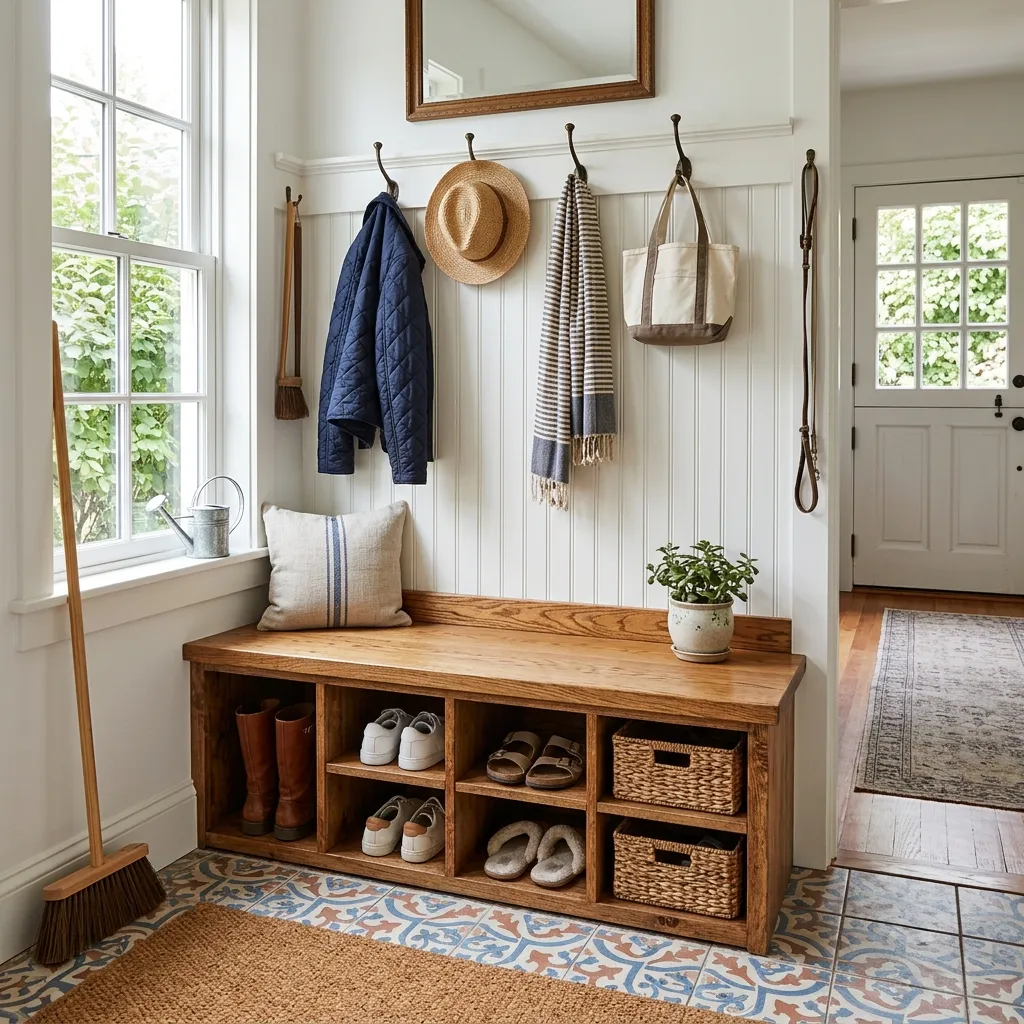
The base is 2x4 framing skinned with 3/4” ply and 1x4 face frames. Each cubby is sized for a standard storage bin; the top is 1” hardwood so it can take abuse. I used pocket screws for the face frames and dados for the horizontal dividers.
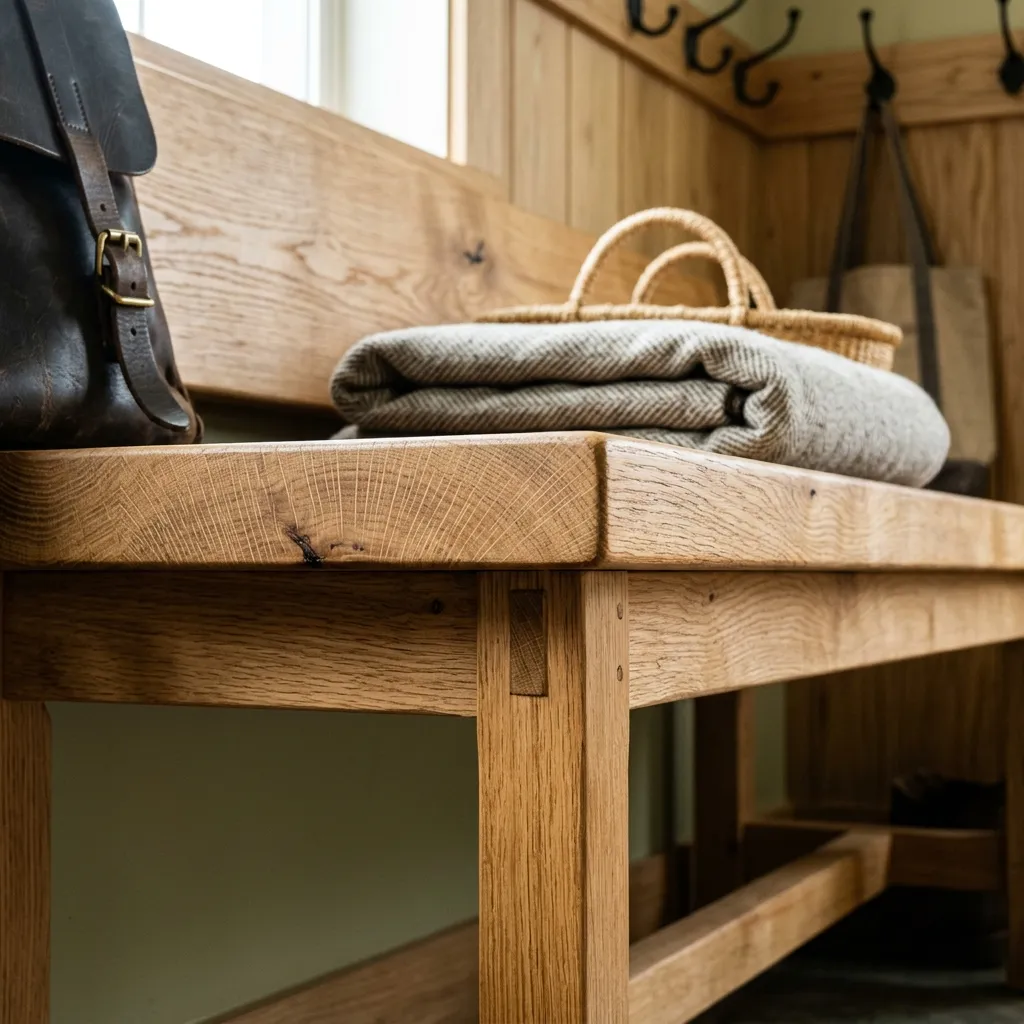
We added heavy-duty coat hooks above and a row of hooks under the seat for bags. Everything is painted to match the trim so it reads as built-in rather than furniture. Total build was two weekends; the mudroom is actually usable now.
We didn’t want to rip out solid oak cabinets—just make them look like they belonged in this decade. So we went with a full refresh: degrease, sand, prime, and two coats of a durable enamel, plus new hinges and pulls.
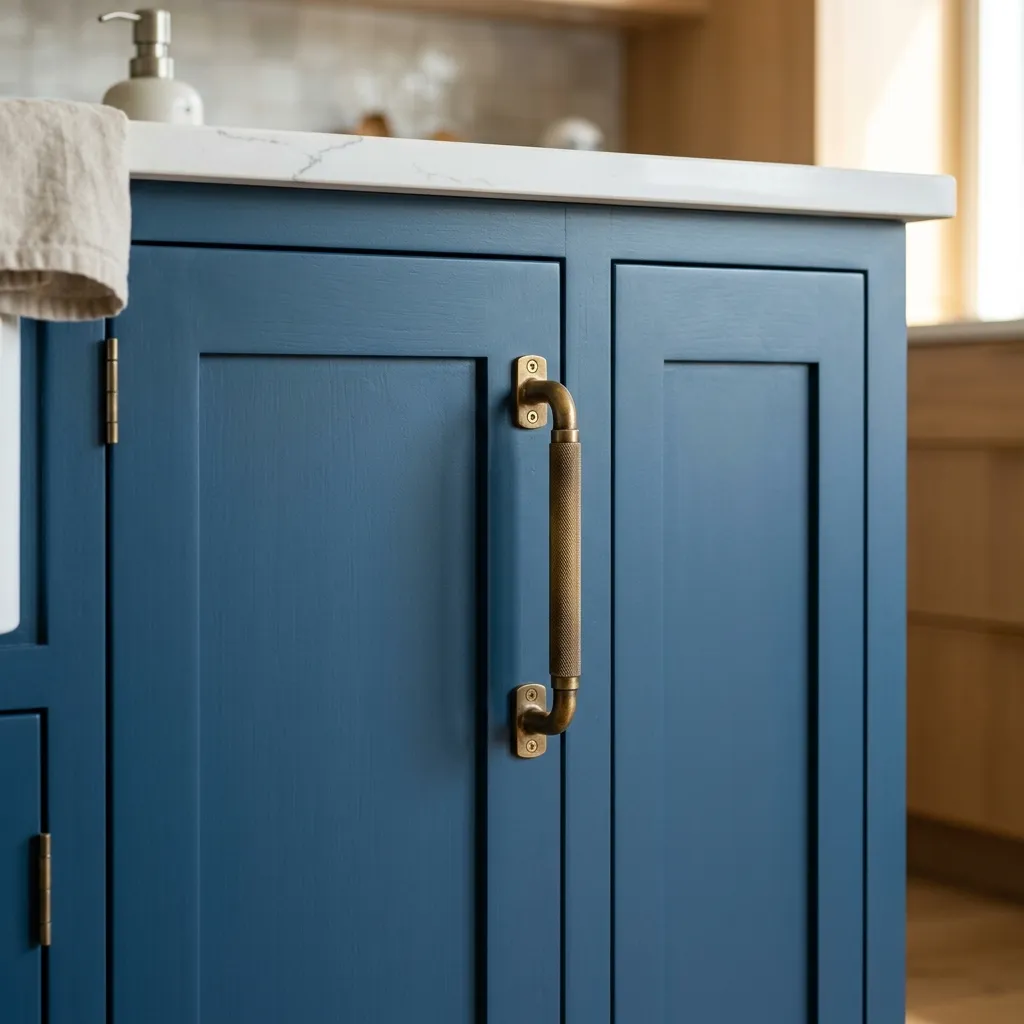
The trick was prep. Every surface got a light sanding, then TSP substitute, then a bonding primer. We used a small roller and a brush for corners; the second coat went on smooth and has held up to daily use.
We also replaced the old hinges with soft-close versions and swapped the knobs for simple bar pulls. Total cost was a fraction of new cabinets, and the kitchen feels like a different room.
The workbench top was always cluttered with chisels, squares, and pencils. I added a shallow tool tray behind the vise—just a recess with a lip so things don’t roll off—and kept the main top clear for the work.
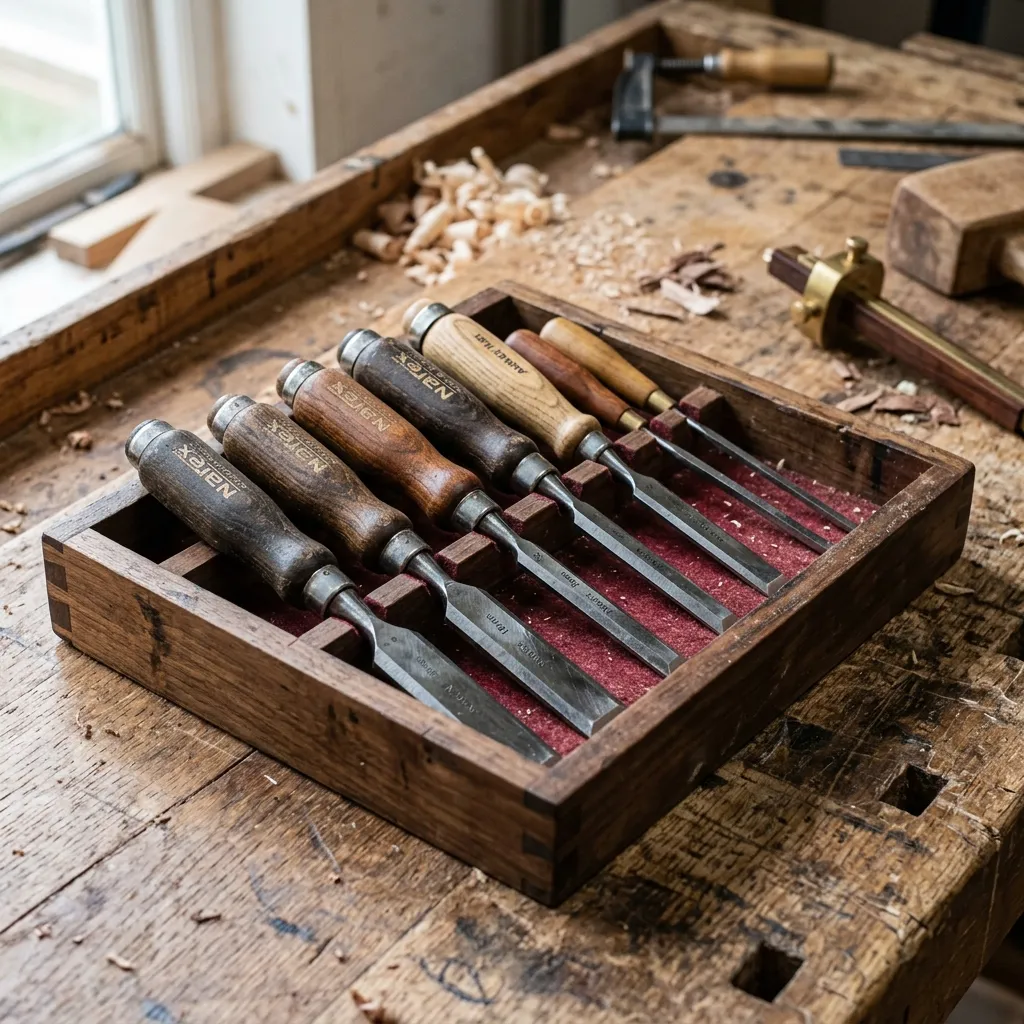
The tray is 4” wide and 1” deep, routed into the top with a straight bit and then squared with a chisel at the corners. I didn’t want a full well, so it’s only behind the vise area. The front lip is 1/2” high so small parts stay put when I’m planing or sawing.
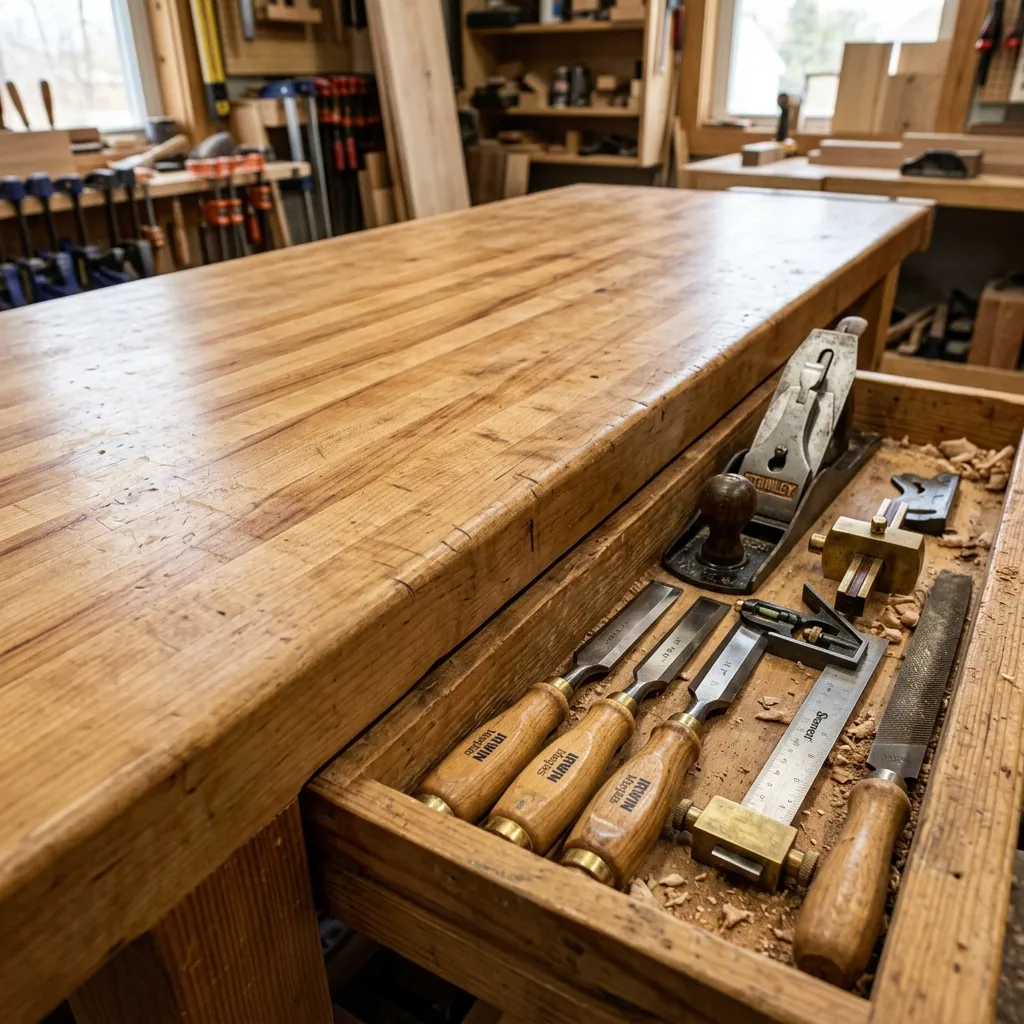
Chisels, marking knife, and a small square live in the tray; the rest of the top is for the piece. Simple change, but it made a real difference in how the bench feels during a build.
After years of working on a wobbly bench, I finally built something that doesn’t move when I’m planing or chopping mortises. The design is a hybrid: European-style base with a thick laminated hardwood top and a leg vise on one end.
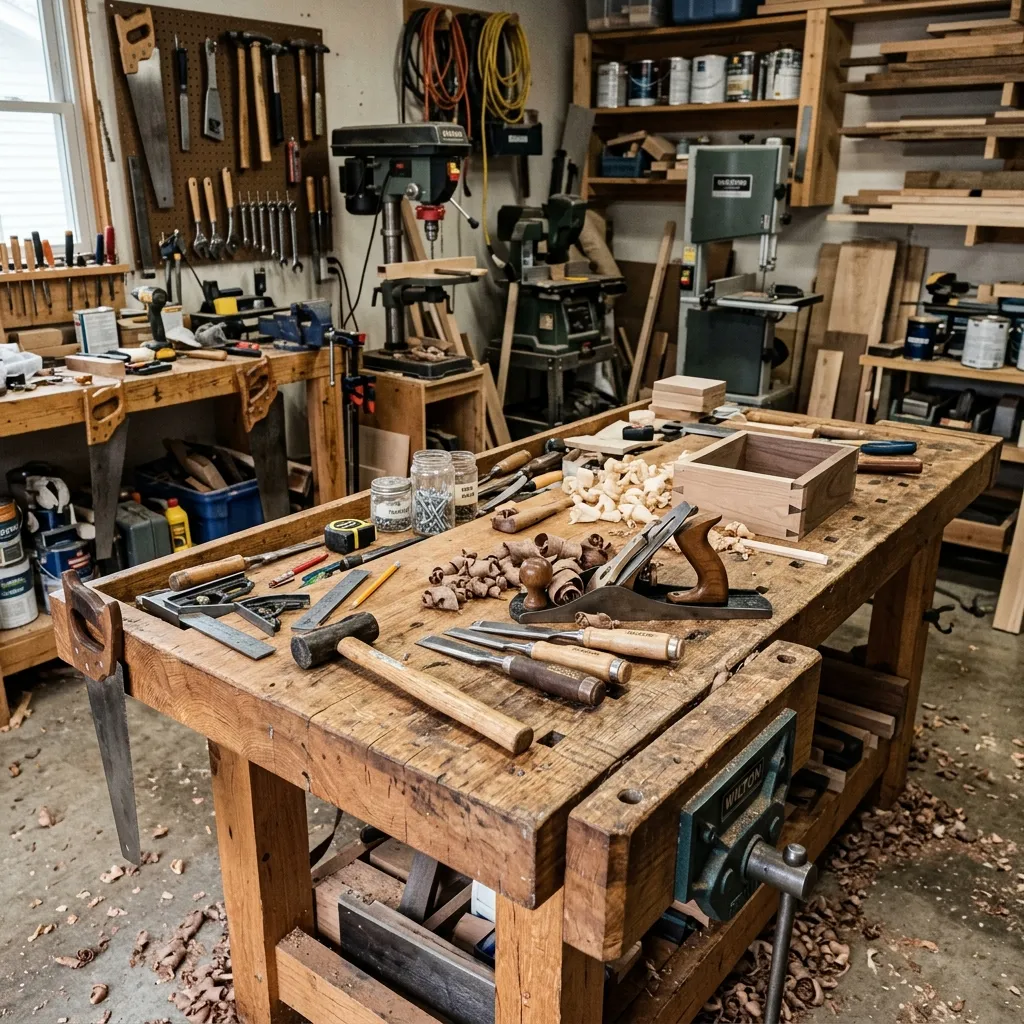
Lamination was the most time-consuming step. I jointed and glued 2” maple in sections, then ran the top through the planer until it was dead flat. The base is mortise-and-tenon with wedged through-tenons at the stretchers so it can be knocked down if we ever move.
The bench is 72” long and 24” deep—enough for most furniture work without dominating the garage. Next up: adding a sliding deadman and a tool well.